Skip to content
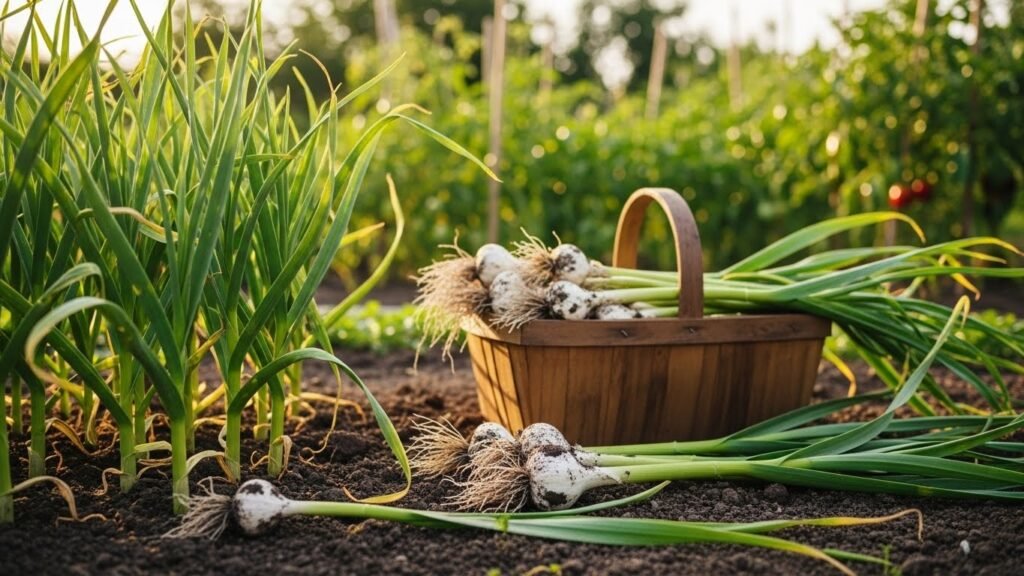
Are you ready to grow the best garlic ever? Growing your own food is a total game changer for your kitchen. Most store-bought garlic is old and lacks that real punchy flavor. When you learn how to plant garlic at home, you get an amazing taste. It is actually one of the easiest crops for any beginner gardener. You just need a little patience and some dirt. This guide will walk you through every single step. We will make sure you become a garlic pro this season.
Introduction to Garlic Cultivation
Garlic has a very unique life cycle compared to other veggies. You usually put it in the ground when everything else is dying. It sleeps under the snow and wakes up early in spring. By mid-summer, you have a massive haul of fresh bulbs. It takes about eight or nine months from start to finish. This long wait is totally worth it for the quality you get. Homegrown garlic is juicier and much more fragrant than the stuff in plastic mesh bags.
Why should you bother growing your own? Store garlic often comes from very far away places. It is treated with chemicals to stop it from sprouting on the shelf. Your garden garlic will be organic and full of life. It is a true superfood that boosts your immune system. Plus, it makes your backyard smell like a five-star Italian restaurant. You can use it in almost every meal you cook.
Garlic is a versatile teammate in your garden layout. It does not take up much room at all. You can tuck it into small corners or dedicated raised beds. It even helps keep some pests away from your other plants. Once you harvest it, the bulbs can last for many months. You will have a steady supply of flavor all winter long. Let’s dive into how to plant garlic the right way.
Selection and Varieties
Choosing the Right Type for Your Climate
There are two main families of garlic you need to know. Hardneck garlic is the king of cold climates like the Midwest. it produces a stiff central stalk called a scape. These varieties are very hardy and handle frozen ground like a boss. They usually have fewer but much larger cloves per bulb. Their flavor is often described as complex and spicy.
Softneck garlic is what you usually see in the grocery store. It thrives in milder climates where winters are not too harsh. These types do not grow a hard central stalk. This makes their necks flexible and perfect for braiding together. Softnecks have many smaller cloves in multiple layers. They generally stay fresh in storage much longer than hardnecks.
Sourcing Quality Seed Stock
Never use garlic from the produce aisle for planting. It is often bleached or sprayed with sprout inhibitors. This means it might never grow or could bring diseases. You want to buy “seed garlic” from a trusted nursery. High-quality seed is usually certified nematode-free and healthy. You can also get great starts from local gardening friends. Always look for big, firm bulbs with no soft spots.
Varieties to Consider
- German White is a fantastic hardneck that loves cold weather.
- Elephant Garlic produces massive bulbs but has a very mild taste.
- Music is a popular choice for beginners because it is very reliable.
- Silverwhite is a great softneck variety that stores for a long time.
- Spanish Roja offers a classic and very pungent garlic heat.
Natural Selection and Seed Saving
You can become a garlic breeder in your own backyard. Every year, save your biggest and best bulbs for replanting. This is called natural selection. Over time, the garlic adapts to your specific soil and weather. You will notice your harvests getting better every single season. It is a sustainable way to keep your garden going forever. Just make sure you only save the healthiest looking cloves.
Site Selection and Soil Preparation
Location Requirements
Garlic is a total sun worshiper in the garden. It needs a spot that gets full sun all day. Avoid areas that are shaded by big trees or tall fences. Good drainage is the most important factor for success. If the soil stays soggy, your cloves will just rot away. You can grow garlic in containers if you lack space. Just make sure your pots are at least eight inches deep.
Soil Health and Composition
The best soil for garlic is rich and very loose. You want a loamy texture that crumbles easily in your hand. Use a garden cultivator to break up any hard clumps of dirt. Garlic roots need to move through the soil without any struggle. If your soil is heavy clay, add some sand or grit. This helps the water move away from the delicate bulbs. Healthy soil equals a healthy and happy harvest.
Amending and Fertilizing the Soil
- Organic Compost should be forked into the bed before you plant.
- Worm Castings provide a gentle boost of nutrients for young roots.
- Complete Fertilizer can be sprinkled lightly during the fall.
- Nitrogen is the main fuel garlic needs when it starts growing.
- Bone Meal helps with strong root development during the winter months.
Crop Rotation and Disease Prevention
Don’t plant garlic in the same spot every single year. You should follow a five to seven-year rotation plan. This keeps soil-born diseases from building up in one area. Avoid spots where you recently grew onions, leeks, or chives. These plants are all in the Allium family and share pests. Moving your garlic around keeps the ecosystem in your garden balanced. It is a simple trick for a much healthier crop.
Planting Procedures

Timing the Plant
Timing is everything when learning how to plant garlic. The best window is usually from October through November. You want to get them in the ground before it freezes solid. This gives the cloves time to grow some roots before winter. Garlic needs a “chilly requirement” to form proper bulbs later. This cold period is called vernalization and lasts about six weeks.
Preparing the Cloves
Wait until the very day you plant to “pop” your bulbs. Carefully separate the individual cloves from the main head. Try to keep the thin papery skin on each clove. This skin acts like a little jacket against rot. Pick the largest cloves for planting to get the biggest bulbs. Smaller cloves can be taken to the kitchen for cooking. Throw away any cloves that feel soft or look moldy.
Planting Technique and Spacing
- Orientation is key; plant the plump root side down.
- Pointy Side should always be facing up toward the sky.
- Depth should be about one to two inches deep.
- Spacing requires four to six inches between each clove.
- Wide Beds allow you to fit more plants in a smaller area.
Seasonal Care and Maintenance

The Winter “Blankie”: Mulching
Once your garlic is tucked in, give it a winter blanket. Cover the bed with four to six inches of organic mulch. You can use clean straw, chopped leaves, or grass clippings. This mulch protects the cloves from the cycle of freezing and thawing. It also keeps the soil moist and stops weeds from taking over. In the spring, the mulch helps keep the ground cool and damp. It is a vital step for a stress-free garden.
Spring Transition
When the snow melts and the ground warms, look for shoots. You will see green tips poking through the mulch in early spring. Sometimes you may need to move the mulch aside for them. This is a great time to give them a little snack. Apply a liquid fertilizer or more compost when they are six inches tall. The plants are waking up and ready to grow fast. Watch them closely as they reach for the sun.
Irrigation Management
Garlic likes a consistent drink of water to grow big. Keep the soil moist during the early spring growing season. Soaker hoses are perfect for delivering water right to the roots. Avoid getting the leaves wet to prevent any fungal issues. As summer approaches, you will need to slow down on the water. Stop watering entirely about two to three weeks before harvest. This helps the bulbs dry out and prevents them from rotting.
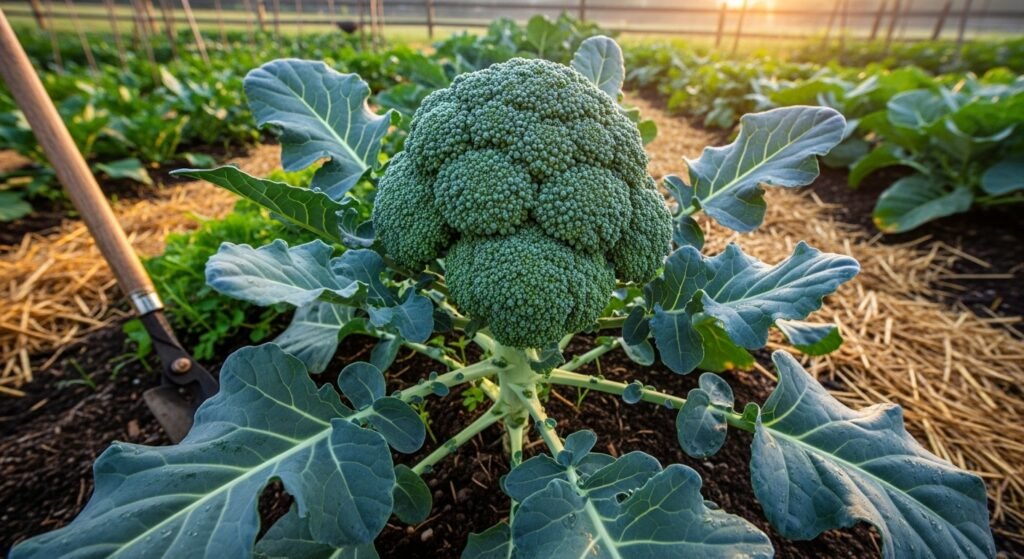
Companion Planting
Garlic is a friendly neighbor to many other garden plants. It works great when planted near the Brassica family. This includes things like kale, broccoli, and crunchy cabbage. The strong garlic scent can help confuse pests like aphids. It is a natural way to protect your other veggies without sprays. Just keep it away from peas and beans, as they don’t get along. Using garlic as a companion plant is smart gardening.
The Scape Phase
Identification and Growth
In early summer, hardneck garlic does something really cool. It sends up a long, curly stalk called a scape. These scapes look like pig tails and have a flower bud on the end. If you leave them, the plant will put its energy into seeds. This is not what we want for big, juicy bulbs. Identifying scapes is easy once you see that distinct curl. It is one of the most exciting parts of the garlic season.
The Importance of Removal
You must cut these scapes off to help the bulb grow. Removing them forces the plant to focus all its power underground. If you leave the scapes on, your garlic bulbs will be much smaller. Most gardeners cut them when they have made one or two loops. Use a pair of clean garden snips or just snap them off. It is a quick chore that makes a huge difference in your yield.
Culinary Uses for Scapes
- Pesto made from scapes is incredibly vibrant and delicious.
- Stir-frys get a great mild garlic crunch from chopped scapes.
- Omelets are much better with a handful of fresh green scapes.
- Grilling scapes with a bit of oil makes a tasty side dish.
- Freezing chopped scapes allows you to use them all winter long.
Harvest and Curing

Signs of Readiness
Knowing when to harvest is just as important as how to plant garlic. Look at the lower leaves of your plants in mid-summer. When the bottom leaves turn brown, it is getting close. You want about half of the leaves to still be green. If the whole plant turns brown, the bulbs might start to split open. You can dig up one bulb to see if it looks full. This usually happens in late June or July.
Harvest Techniques
Be very gentle when you take your garlic out of the ground. Don’t just grab the stem and pull as hard as you can. Use a garden spade or fork to loosen the soil around the bulb. Carefully lift the whole plant out with its roots and leaves attached. Brush off any big chunks of dirt with your hands. Never wash your garlic with water after you harvest it. Water can cause mold and ruin your whole crop.
The Curing Process
Curing is the secret to making garlic last for months. Lay the plants out in a single layer in a dry spot. A screened porch, garage, or shed works perfectly for this. Keep them out of the direct sun so they don’t get “sun scald”. You need great air circulation, so using a fan is a smart move. The garlic is cured when the outer skins are dry and papery. This usually takes about two to four weeks.
Top Organic Fertilizers and Application Schedule for Growing Great Garlic

To grow big and healthy bulbs, you need to feed your plants the right way. Garlic is a heavy feeder that loves a boost of nutrients during its long growing season. Here is a list of organic options and a specific schedule to help you get the best results from your garden.
Recommended Organic Fertilizers
- Organic Compost should be forked into your garden beds before you even start planting to build soil health.
- Worm Castings provide a very gentle and natural boost of nutrients for the young roots.
- Bone Meal is excellent to add in the fall because it helps with strong root development during the cold winter months.
- Fish and Seaweed Emulsion is a great liquid fertilizer to use in the spring once the green shoots appear to encourage fast growth.
- Chicken Manure Dressings can be used to increase soil fertility and provide the nitrogen garlic needs to grow large leaves.
- Blood Meal is a fast-acting source of nitrogen that helps the plants grow large green leaves in the early spring.
- Well-Rotted Cow Manure helps improve the soil structure while adding essential organic matter for bulb formation.
- Alfalfa Meal provides a slow-release source of nutrients and also helps increase the amount of organic matter in your soil.
Fertilizer Application Schedule
Fall (Pre-Planting and Planting)
- Step 1: Before planting in October or November, fork Organic Compost and Well-Rotted Cow Manure into the soil to ensure it is rich and loose.
- Step 2: Add a light sprinkling of Bone Meal or a Complete Fertilizer into the planting holes to support root growth before the ground freezes.
- Step 3: A small amount of Worm Castings can be added at this stage to provide a gentle start for the cloves.
Early Spring (Active Growth)
- Step 4: Once the green tips poke through the mulch and reach about six inches tall, apply a high-nitrogen snack like Blood Meal or Fish and Seaweed Emulsion.
- Step 5: This is also the best time to apply Chicken Manure Dressings to fuel the rapid growth phase.
Late Spring (Bulb Formation)
- Step 6: Continue using liquid fertilizers like Fish and Seaweed Emulsion every few weeks until early May.
- Step 7: Stop all fertilization by late May or early June as the plant shifts its energy from leaf growth to underground bulb formation.
Essential Tools and Equipment Checklist for Your Garlic Garden

To successfully grow a massive haul of fresh bulbs, having the right gear for each stage of the eight or nine-month cycle is very helpful. Garlic is a versatile teammate in the garden, and using these tools will help you manage it efficiently from planting to preservation.
Preparation and Planting Tools
- Garden Spade or Fork: Used to loosen the soil and break up hard clumps of dirt so roots can move without struggle.
- Three-Prong Cultivator: Essential for ensuring the soil is rich, loose, and has a loamy texture before the cloves go in.
- Measuring Tape or Ruler: Helpful to ensure cloves are planted one to two inches deep and spaced four to six inches apart.
- Garden Markers and Labels: Necessary to identify different varieties, such as Music or German White, so you don’t accidentally cook your best seed bulbs.
Maintenance and Care Equipment
- Organic Mulch: You will need four to six inches of clean straw, chopped leaves, or grass clippings to act as a winter blanket.
- Soaker Hoses: These are perfect for delivering a consistent drink of water directly to the roots while keeping leaves dry.
- Clean Garden Snips: Used to cut off the curly scapes in early summer to force the plant to focus its power underground.
- Liquid Fertilizer Applicator: Useful for feeding the plants fish emulsion or compost tea when shoots reach six inches tall.
Harvesting and Curing Gear
- Garden Fork: Vital for gently lifting the whole plant out of the ground without grabbing the stem and pulling.
- Hand Brush: Used to brush off big chunks of dirt after harvest; remember never to wash the bulbs with water.
- Drying Racks or Screens: Essential for laying plants in a single layer to ensure great air circulation during the two to four-week curing process.
- Electric Fan: A smart move to keep air moving in your garage or shed to prevent mold and help skins become papery.
Storage and Preservation Supplies
- Mesh Bags or Baskets: These allow for the necessary airflow to keep bulbs fresh for many months.
- Airtight Freezer Bags: Used for freezing whole unpeeled cloves or chopped scapes for winter use.
- Glass Jars: Necessary for the vinegar method or for creating honey-fermented treats.
- Dehydrator and Grinder: Used if you want to turn your harvest into homemade garlic powder.
Common Garlic Pests and Diseases to Watch for in Spring
Keeping your garden healthy is a simple trick for a much better crop. While garlic is a hardy plant, being able to identify potential issues during the spring transition is vital for a stress-free garden.
- Soil-Borne Diseases can build up in one area if you plant in the same spot every year. Following a five to seven-year rotation plan helps keep these diseases from affecting your harvest.
- Allium Pests like those that affect onions, leeks, or chives often share the same host plants as garlic. Moving your garlic around keeps the ecosystem in your garden balanced.
- Aphids and other small insects can sometimes target your green shoots. The strong scent of garlic often confuses these pests, making it a natural way to protect your garden without using sprays.
- Fungal Issues can occur if the leaves stay too wet. To prevent this, use soaker hoses to deliver water right to the roots and avoid getting the foliage damp.
- Mold and Rot may develop if the soil stays soggy or if bulbs are washed with water after harvest. Proper drainage and keeping the bulbs dry are the most important factors for success.
- Nematodes are microscopic pests that can ruin a crop. The best way to avoid them is to buy high-quality seed garlic that is certified nematode-free.
- Sun Scald can damage your bulbs after they are taken out of the ground. Always keep your harvested garlic in a dry spot out of direct sun during the curing process.
The Garlic Growing Cycle: A Month-by-Month Checklist
Learning how to plant garlic is a long wait that is totally worth it for the quality you get. This simple schedule breaks down the eight to nine-month process into easy steps.
October – November: Planting Season
- Source Seed: Buy high-quality seed garlic from a trusted nursery or local friends rather than using store-bought bulbs.
- Prepare Soil: Fork organic compost and well-rotted cow manure into your beds to ensure the dirt is rich and loose.
- Plant Cloves: Separate cloves on planting day and place them root-side down, one to two inches deep, and four to six inches apart.
- Apply Mulch: Cover the bed with four to six inches of straw or leaves to protect the cloves through the winter.
December – February: The Chilly Sleep
- Vernalization: Allow the garlic to sit through at least six weeks of cold temperatures to ensure proper bulb formation.
- Dormancy: The plants will sleep under the snow while growing roots underground.
March – April: Spring Awakening
- Monitor Growth: Look for green shoots poking through the mulch as the ground warms up.
- Spring Feeding: Once shoots reach six inches tall, apply a high-nitrogen liquid fertilizer like fish and seaweed emulsion.
- Watering: Keep the soil moist during this active growth phase to help the plants grow big.
May: Growth and Transition
- Maintain Fertility: Continue liquid feeding every few weeks until early May to fuel leaf development.
- Stop Feeding: Cease all fertilization by late May so the plant can shift its energy to the underground bulb.
June: The Scape Phase
- Identify Scapes: Watch for curly stalks to emerge from hardneck varieties.
- Remove Stalks: Cut or snap off scapes to force the plant to focus all its power into the bulb.
- Kitchen Use: Harvest the scapes for pesto, stir-frys, or grilling.
July: Harvest and Curing
- Check Readiness: Harvest when the bottom leaves turn brown but about half the plant is still green.
- Lift Gently: Use a garden spade to loosen the soil and carefully lift the bulbs out.
- Start Curing: Lay garlic in a single layer in a dry, shaded spot with good airflow for two to four weeks.
August – September: Storage and Selection
- Clean and Trim: Once skins are papery, trim the roots and stems and store in a cool, dark place like a pantry.
- Save Seeds: Pick your absolute biggest and healthiest bulbs to save as seed for the next planting cycle in October.
Long-Term Storage and Preservation
Ideal Storage Conditions
Once cured, trim the roots and stems off your garlic. Store the bulbs in a cool and dark place with some airflow. A dry basement or a pantry is a great choice. Avoid keeping garlic in the refrigerator because it might start to sprout. Mesh bags or baskets are better than plastic containers. If you grew softneck garlic, you can braid the stems together. Braids look beautiful hanging in your kitchen or mudroom.
Culinary Preservation Methods
- The Vinegar Method involves putting peeled cloves in white vinegar.
- Freezing whole unpeeled cloves is the fastest way to save them.
- Garlic Oil cubes can be made by freezing minced garlic in olive oil.
- Dehydration lets you grind your garlic into homemade powder.
- Honey Fermentation creates a sweet and healthy treat for winter.
- Roasting bulbs and freezing the paste makes cooking very easy.
Preparation for the Next Cycle
Before you eat all your garlic, save your seed for next year. Pick the absolute biggest bulbs from your harvest. These are the ones that will go back into the ground in October. Label them so you don’t accidentally cook them for dinner. This completes the cycle of your sustainable garlic garden. You are now ready to grow even better garlic next year. Gardening is a lifelong journey of learning and tasting.
Kitchen Guide: Using Preserved Garlic in Winter Recipes
Homegrown garlic is juicier and much more fragrant than store-bought options. Once you have harvested and cured your crop, you will have a steady supply of flavor all winter long. This guide explains how to use your various preserved garlic formats in your daily cooking.
Using Cured Bulbs and Cloves
- Whole Bulbs: Use your cured bulbs in almost every meal you cook to provide a punchy flavor.
- Roasting: Roasting bulbs makes cooking very easy as you can squeeze out the paste for instant use in mashed potatoes or spreads.
- Fresh Cloves: Peeled cloves from your cured stash are a true superfood that can boost your immune system during the cold months.
Cooking with Preserved Methods
- Garlic Oil Cubes: Drop these pre-made cubes into a hot pan for a quick start to stir-frys or sautéed vegetables.
- Honey Fermented Garlic: Use this sweet and healthy treat as a glaze for meats or a natural remedy during the winter.
- Vinegar-Soaked Cloves: Use these sharp, preserved cloves in salads or as a garnish for savory dishes.
- Homemade Garlic Powder: Sprinkle your dehydrated and ground garlic onto popcorn, soups, or stews for a concentrated flavor boost.
Utilizing Scapes in Winter
- Frozen Scapes: Add chopped frozen scapes to omelets or stir-frys to enjoy a mild garlic crunch long after the summer ends.
- Scape Pesto: Use thawed scape pesto as a vibrant sauce for pasta or a flavorful base for winter pizzas.
Frequently Asked Questions
Understanding how to plant garlic and manage its unique life cycle is key to a massive harvest. Here are additional insights into the nuances of garlic gardening that ensure a stress-free experience.
Can I plant garlic in the spring?
Yes, you can plant in early spring as soon as the soil can be worked. However, fall planting is generally preferred because it gives the cloves more time to grow roots before the ground freezes.
Why is my garlic so small?
Small bulbs are often the result of leaving scapes on the plant, which forces the plant to put its energy into seeds rather than the bulb. Additionally, if the soil is heavy clay or stays soggy, the roots struggle to move through the dirt, limiting growth.
Does garlic need a lot of fertilizer?
Garlic is considered a heavy feeder that requires a boost of nutrients during its long growing season. While it needs nitrogen-rich snacks like blood meal in the early spring, it requires a shift in energy to bulb formation by late May, meaning you should stop fertilizing then.
How do I know if my garlic has gone bad in storage?
Bad garlic often loses its firm texture or shows signs of rot. When selecting bulbs for planting or eating, you should always look for firm bulbs and throw away any cloves that feel soft or look moldy.
Should I peel the cloves before planting?
No, you should try to keep the thin papery skin on each clove when you separate them. This skin acts like a protective jacket against rot while the clove is in the ground.
What is the easiest variety for beginners?
Music is a very popular and reliable choice for beginner gardeners. German White is also highly recommended for those in cold climates because it handles frozen ground effectively.
How long does cured garlic last?
Softneck varieties generally stay fresh in storage much longer than hardnecks. When stored in a cool, dark place with airflow, your harvest can provide a steady supply of flavor all winter long.
Can I grow garlic in a pot?
Yes, garlic can be grown in containers if you have limited space. The most important factor is ensuring the pots are at least eight inches deep to allow for proper root development.
What should I do if my garlic starts to sprout in the cupboard?
If your garlic begins to sprout in late winter, you can use the vinegar method, which involves putting peeled cloves in white vinegar to preserve them. You should avoid keeping garlic in the refrigerator to prevent premature sprouting.
Is mulch really necessary?
Mulch is a vital step because it protects the cloves from the cycle of freezing and thawing. It acts as a winter blanket that also keeps the soil moist and prevents weeds from taking over the bed.
Why should I avoid grocery store garlic for planting?
Store-bought garlic is often treated with chemicals or sprout inhibitors to stop it from growing on the shelf. It may also be bleached, which can lead to disease or a complete failure to grow in your garden.
What is vernalization?
Vernalization is the “chilly requirement” garlic needs to form proper bulbs. This process requires the cloves to experience about six weeks of cold temperatures.
When exactly should I “pop” my garlic bulbs?
You should wait until the very day you intend to plant before you separate the individual cloves from the main head. This helps keep the cloves fresh and protected until they go into the dirt.
How can I prevent sun scald on my harvest?
Always keep your harvested garlic in a dry, shaded spot like a garage or shed during the curing process. Never leave the bulbs in direct sun after taking them out of the ground.
Why is crop rotation important for garlic?
Following a five to seven-year rotation plan prevents soil-borne diseases from building up in one area. This simple trick keeps the ecosystem of your garden balanced and your crops healthier.
What are the signs that garlic is ready for harvest?
The best indicator is when the lower leaves turn brown in mid-summer, while about half of the upper leaves are still green. Harvesting too late, when the whole plant is brown, can cause the bulbs to split open.
Can I use garlic as a companion plant?
Garlic is an excellent neighbor for the Brassica family, including kale, broccoli, and cabbage. Its strong scent confuses pests like aphids, providing a natural way to protect your other vegetables.
What tools do I need to harvest garlic without damage?
You should use a garden spade or fork to loosen the soil around the bulb rather than pulling the stem. A garden fork is particularly vital for gently lifting the whole plant out of the ground.
How do I store garlic for the long term?
Once cured, garlic should be stored in mesh bags or baskets that allow for airflow. Keep them in a cool, dark place like a pantry or dry basement, and avoid plastic containers that trap moisture.
What can I do with the roots and stems after curing?
After the skins have become dry and papery (usually after two to four weeks), you should trim the roots and stems before moving the bulbs to their final storage location.