Skip to content
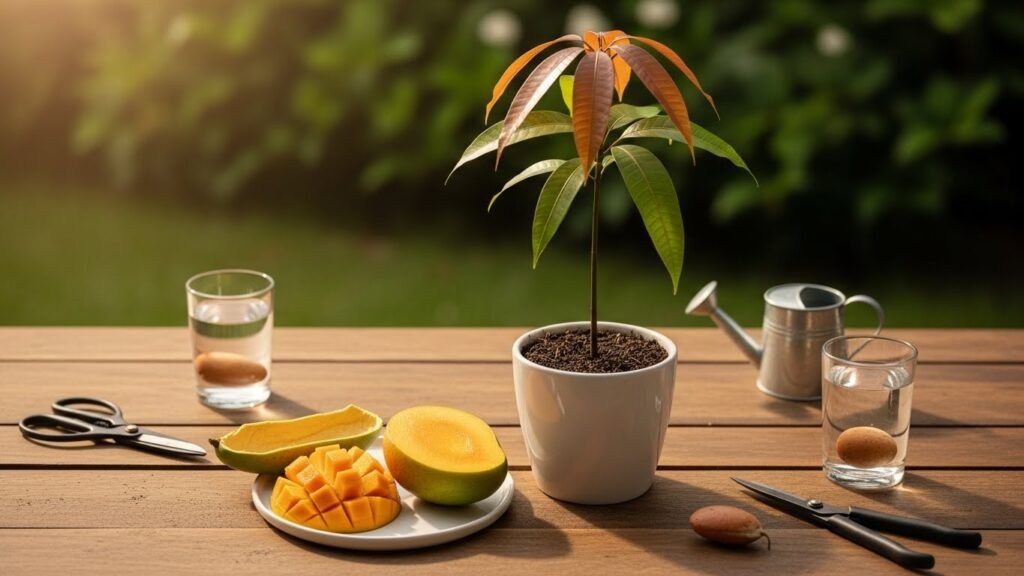
Growing your own food is a total blast. Mangoes are the true King of Fruits in the garden. They are super sweet and juicy when they are ripe. Most store-bought ones are okay but they are expensive. You can save some cash by using your kitchen scraps. Learning how to grow a mango tree from seed is easier than you think. You just need some patience and some basic gear. Let’s dive into this tropical adventure together. It is going to be a fun ride for sure.
Introduction: The Journey from Kitchen Scrap to Exotic Tree
The appeal of homegrown mangoes is really quite simple. You get a much better flavor when you pick them yourself. Store fruit is often picked green and lacks that real sugar kick. Growing from seed is a cheap way to start your own orchard. You are basically turning trash into a beautiful living tree. It is a great project for the whole family to enjoy. Plus you get to brag about your green thumb skills.
You do need to be a bit patient with this process. The success rate is usually around twenty percent for most beginners. It takes a long time for a seed to become a tree. You are making a big commitment to this plant for years. Don’t get discouraged if the first one doesn’t work out. Just keep trying until you see that first green sprout. The reward is worth every second of the wait.
Mangoes love the heat and plenty of moisture. They naturally grow in tropical and subtropical spots around the world. If you live in USDA zones 10b through 11 you are golden. You can plant them right in the ground in those areas. People in colder spots can still grow them in big pots. You just have to bring them inside when it gets chilly. This makes mangoes a fun option for almost any gardener.
Understanding Mango Types: Monoembryonic vs. Polyembryonic

Genetic variability is a fancy way to say seeds are a surprise. Seed-grown trees usually differ from their parent plants quite a bit. This happens because of sexual reproduction in the flower. The DNA gets all mixed up during the pollination process. You might get a fruit that tastes totally different from before. It is like a biological lottery every time you plant. Only clones stay exactly the same as the mother tree.
Monoembryonic seeds are very common in many store varieties. These seeds produce only one single plant from the pit. That one plant is a unique hybrid with its own traits. It will not be a clone of the tree it came from. Most of these types come from Indian varieties of mango. They are great for breeding new types of fruit. However they can be a gamble for flavor.
Polyembryonic seeds are the secret weapon for many home growers. These seeds contain multiple embryos inside a single husk.
- Identifying embryos: You will see several small sprouts coming out.
- Clones: Most of these sprouts are identical copies of the parent.
- Fertilized seedling: One sprout is usually a unique hybrid.
- Separation: You can actually pull these embryos apart gently.
- Multiple trees: This lets you grow several identical trees at once.
Essential Materials for Starting Your Mango Tree
Choosing the right fruit is the most important first step. You need a very ripe and healthy mango for success. This ensures the seed inside is fully mature and ready. If the fruit is green the seed might be duds. Look for fruit that smells sweet at the stem end. Avoid any that have soft spots or weird mold growing. A good fruit usually means a good start for you.
You will need some basic tools from your kitchen drawer. Strong kitchen shears or scissors are great for the husk. A dull knife helps you scrape away the leftover fruit. You will also need some soap and water for cleaning. Having everything ready makes the job much easier and faster. Make sure your tools are clean to prevent any rot.
The germination kit is pretty simple to put together. You need standard paper towels and some Ziploc-style bags. A plastic fruit container or clam shell works as a greenhouse. This helps keep the heat and moisture locked inside. Labeling your bags with a marker is a smart move. It helps you keep track of the date and type. You won’t have to guess how long it has been.
Finally you need your potting essentials for the next stage.
- Pots: Get a one-gallon pot with plenty of drainage holes.
- Soil: Use a high-quality potting soil that drains very well.
- Fertilizer: A little bit of slow-release food helps a lot.
- Water source: Make sure you have easy access to clean water.
Preparing the Pit: Extraction and Cleaning
First you need to clear all the flesh from the pit. You can eat the fruit or cut it away. Use a faucet to scrub the pit really well. You want to remove all the sticky sugar and meat. Any leftover fruit can lead to mold or pests later. A clean pit is a happy pit for growing.
The drying phase is a crucial step for your success. Set the clean husk in the sun for a day. Flip it over so both sides get nice and dry. This makes the husk less slippery and easier to hold. It also makes the outer shell a bit more brittle. This helps when you need to pry it open later. Do not leave it out too long or it might die.
Now you need to scrape away those pesky little hairs. Use a dull knife or your fingers for this part. Pulling these fibers off reveals the actual structure of the shell. It helps you find the weak spots in the husk. You are looking for a small hole or a seam. This is your entry point for getting to the seed. It takes a bit of elbow grease to finish.
Opening the Husk: Getting to the Seed

Safety is your number one priority when opening the shell. Use a dull knife or kitchen shears for this job. You do not want to stab the delicate kernel inside. A cut seed will usually rot and never grow. Work slowly and keep your fingers out of the way. It is better to take your time and be safe. You only get one shot with each seed you have.
Finding the right opening spot makes the task much easier. Look for the rounded end or the hairy side seam. Use your tool to gently pry the two halves apart. You can often use your hands once it starts to open. It feels a bit like opening an oyster or a clam. Once you see the seed you are almost there.
Seed inspection is the next thing you need to do.
- Umbilical cord: Carefully detach the cord connecting seed to husk.
- Healthy color: A good seed looks tan and very fresh.
- Bad signs: Avoid seeds that look shriveled or have black spots.
- Seed skin: Only remove the papery coat if it is loose.
- Leave it: If the skin is stuck on tight just leave it.
The Pre-Germination and Soaking Process
The twenty-four-hour soak is a total game changer for growers. Place your bare seed in a glass of clean water. Let it sit there at room temperature for a full day. This helps the seed absorb plenty of hydration right away. It wakes up the embryo from its deep sleep state. You will notice it might swell up a little bit. It is a simple step with a huge payoff.
Priming the seed helps jumpstart the whole metabolic process. It signals to the plant that it is time to grow. This often leads to much faster sprouting in the bag. You are giving the plant the energy it needs to start. It reduces the time the seed spends in the shell. Faster growth means less time for mold to take over. It is a pro move that really works well.
Mastering the Germination Phase
The paper towel method is the gold standard for starting. Wet a paper towel and then squeeze out the extra. You want it damp like a sponge but not dripping. Wrap the seed up gently in the moist towel layers. This provides the perfect balance of water and air. Too much water will cause the seed to rot. Not enough water will cause it to dry out.
Creating the balloon effect is a neat little trick to try. Put the wrapped seed in a plastic bag first. Blow some air into the bag before you seal it. This creates a humid environment full of CO2 for growth. It acts like a tiny personal bubble for your seed. The air helps prevent the towel from sticking to the bag. It also provides some insulation from temperature changes.
The portable greenhouse is a great way to protect your bag. Use a plastic clam-shell fruit container for this part. It adds another layer of warmth and moisture control.
- Labeling: Write the date and type on the container.
- Location: You can put it on a sunny windowsill.
- Dark drawer: Some people prefer a dark drawer for roots.
- Warmth: Ensure the spot stays consistently warm for the plant.
- Checks: Peek inside every day to see how it looks.
Planting the Sprouted Seedling
Timing the move to soil is all about the roots. Wait until you see a strong root and a sprout. This usually takes about one to two weeks of time. You want to see some green before you plant it. If the root is too long it might break. If it is too short it might not survive. Look for a healthy balance before you make the move.
Preparing the first pot takes just a few minutes. Fill your pot about two-thirds full with fresh soil. Soak the soil with water and let it drain. This ensures the soil is settled and moist for growth. You don’t want any dry pockets in the pot. A well-prepared pot gives the roots a great home. It makes the transition much smoother for the plant.
Correct orientation is very important for a straight tree.
- Flat side: Place the seed with the flat side down.
- Root direction: Ensure the root can grow down into the soil.
- Shoot position: The sprout should be pointing towards the top.
- Spacing: Give the root plenty of room to stretch out.
- Stability: Make sure the seed isn’t wobbling in the dirt.
Covering the seed should be done very lightly and carefully. Use about an eighth of an inch of soil. You do not want to bury it deep in the pot. The new leaves need to reach the light quickly. Press the soil down very gently with your fingers. This removes any large air gaps around the seed. It helps the seed stay moist and secure in place.
Handle the seedling with extreme care during this whole stage. The tap root is very fragile and breaks easily. If you break the main root the plant dies. Be extra gentle when removing it from the bag. Use a light touch when placing it in the soil. Think of it like a tiny baby that needs help. Your careful hands will ensure it grows up strong.
Early Growth and Developmental Stages

You can expect some cool milestones in the first months.
- Two weeks: You should see a small sprout appearing.
- Five weeks: Real leaves should start to open up wide.
- Sixteen weeks: The stem will start to get much thicker.
- Twenty-four weeks: You will have a small sapling with branches.
- Growth spurts: Mangoes often grow in quick bursts of energy.
The mystery of leaf color is a fun part of growth. New leaves often look purple red or even bronze. This is totally normal and not a sign of sickness. The color helps protect the young leaves from the sun. As the leaves get older they turn bright green. They will also get much tougher and more leathery. It is just the plant’s way of growing up.
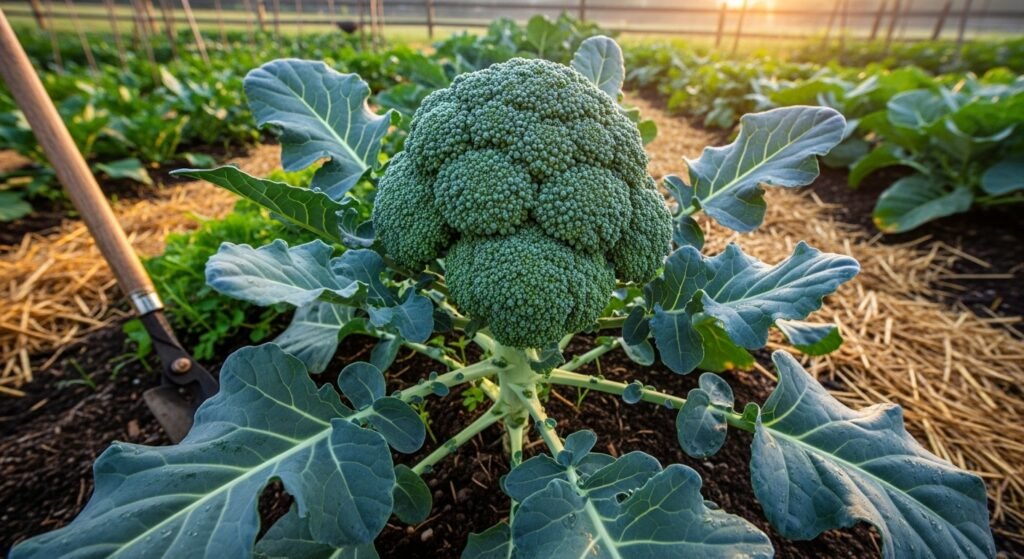
Sunlight acclimatization is a slow and steady process for you. Start your plant in a spot with partial shade. Gradually move it into more sun over three months. Sudden full sun can burn the tender young leaves. Once it is established it will crave the full sun. It needs that light to make food for growth. Proper lighting is the key to a healthy tree.
Root management is something you need to watch closely now. Use pots with bottom drainage to help the roots breathe. This allows for air pruning of the main tap root. Air pruning stops the root from circling the pot. It encourages a much denser and stronger root system. Place your pot on a wire rack for best results. This keeps your tree healthy and ready for planting.
Checklist: How to Identify a Healthy vs. Unhealthy Mango Seed
Before you invest weeks of time into the germination process, you should carefully inspect the seed you have extracted from the husk. A healthy seed has a much higher chance of sprouting, while an unhealthy one will likely rot in the bag. Use this checklist to pick the best candidate for your garden.
- Check the color: A healthy seed should be a creamy tan or off-white color. If the seed is dark brown, grey, or completely black, it is likely dead or rotting.
- Look for plumpness: Healthy seeds are thick and feel full to the touch. Shriveled or very thin seeds often lack the energy needed to sprout successfully.
- Inspect for mold: Check the surface for any fuzzy white, green, or black spots. If mold has already started growing on the seed inside the husk, it will quickly take over during the germination phase.
- Smell the seed: A viable seed should have a neutral or slightly nutty scent. If it smells sour, fermented, or “rancid,” bacteria have already begun to break it down.
- Watch for “the umbilical cord”: When you open the husk, look for a small cord connecting the seed to the shell. If this is present and looks fresh, it is a good sign that the seed was receiving nutrients right up until you opened it.
- Check for holes: Look closely for tiny holes or tunnels in the seed. These are signs of seed weevils or other tropical pests that may have eaten the embryo.
- Observe the skin: If the thin, papery skin around the seed is intact and tight, it helps protect the seed. If the skin is slimy or falling off in mushy pieces, the seed may be waterlogged and damaged.
- Test the firmness: Gently press the seed between your fingers. It should feel firm like a fresh bean. If it feels soft, mushy, or hollow, it is not a good candidate for planting.
- Look for early sprouts: Sometimes, you will find a seed that has already started to turn green or grow a tiny root inside the husk. This is a very “healthy” sign and means you can skip straight to the soaking phase.
Long-Term Maintenance and Tree Care
Watering schedules need to be very consistent for your tree. Check the soil often to see if it is dry. You want moist soil but never a soggy mess. Over-watering can lead to root rot and death. During hot summer days you might water every day. In the winter you can cut back on watering. Pay attention to what your plant is telling you.
Feeding your tree helps it grow much faster and stronger. Use a balanced fertilizer to support the new growth. Slow-release pellets are a great choice for home growers. They provide a steady stream of nutrients over time. Do not over-feed your young mango tree at first. Too much food can burn the roots and leaves. A little bit goes a long way for success.
Size control and pruning are vital for managed garden spaces.
- Indoor trees: Prune them to stay between eight and ten feet.
- Air circulation: Cut out the middle to let air flow through.
- Disease prevention: Good air flow stops mold from growing on leaves.
- Forked stems: Choose one main stem and prune the others.
- Dominant leader: A single trunk makes for a much stronger tree.
How to Protect Your Mango Tree During Its First Winter
Mangoes are tropical plants that naturally thrive in heat and moisture. If you do not live in a warm climate like USDA zones 10b through 11, you must take extra steps to keep your tree alive when temperatures drop. Young seedlings are especially vulnerable to cold damage during their first year.
- Move containers indoors: If your mango is growing in a pot, bring it inside whenever the temperature drops below freezing.
- Provide bright light: Place your indoor tree near a very bright window or use grow lights to replace the sunlight it misses during winter.
- Adjust your watering: You should cut back on watering during the winter months, as the plant grows more slowly in the cold.
- Check for cold damage: Watch for leaves turning black, which is a common sign that the tree has been exposed to temperatures that are too low.
- Avoid over-fertilizing: Do not give the tree heavy food during the winter; it is better to wait until the warmth of spring returns.
- Guard against wind: If the tree is still outside during chilly but non-freezing days, keep it in a sheltered spot because high winds can break the brittle branches of young trees.
- Maintain consistent warmth: Try to keep the indoor environment at a steady, warm temperature to avoid stressing the plant.
Advanced Strategies: Grafting and Fruit Production

The waiting game is the hardest part of growing seeds. A seed-grown tree takes five to eight years to fruit. In some cases it might even take ten years. Grafted trees from a nursery only take three years. You are trading time for the fun of growing. It is a long journey but the result is great. Just stay the course and keep your tree healthy.
The grafting solution is a great way to speed things up. You can attach a branch from a known tasty tree. This branch will produce the exact same fruit as before. It also helps the tree fruit much sooner than seeds. Grafting takes some practice but is very rewarding to do. You can create a tree with several different types. It is a cool way to maximize your garden space.
Cold climate solutions are a must for many northern growers. You can grow “Condo Mangoes” which are dwarf varieties in pots. These trees stay small and can live inside easily. Bring them indoors whenever the temperature drops below freezing. They need a bright window or some grow lights. This lets you enjoy tropical fruit in any state. It is a great way to defy the seasons.
How to Choose the Best Mango Variety for Grafting
If you decide to graft your seed-grown tree, you are essentially choosing the specific flavor, size, and quality of the fruit you will harvest in the future. Grafting allows you to skip the mystery of a seedling and ensures you get exactly what you want.
- Consider your climate: Some mango varieties handle humidity better, while others are more resistant to fungal diseases that thrive in wet air.
- Think about tree size: If you are growing in a pot, look for “dwarf” or “condo” varieties like ‘Cogshall’ or ‘Pickering’ that stay naturally small.
- Determine your flavor preference: Mangoes can taste like anything from citrus and coconut to spicy or classic sweet honey; research flavor profiles before choosing.
- Check the harvest season: Some trees produce fruit early in the summer, while others are late-season producers; choosing one of each can give you fruit for months.
- Look for disease resistance: Varieties such as ‘Keitt’ or ‘Nam Doc Mai’ are known for being hardy and resisting common pests better than others.
- Evaluate fruit texture: Some older varieties are very “stringy” or fibrous, while modern favorites are smooth and buttery like a dessert.
- Find a local donor: The best variety for you is often one that is already thriving in your neighbor’s yard or a nearby local orchard.
- Assess the yield: Some trees produce a few massive fruits, while others produce hundreds of smaller ones; decide which fits your family’s needs best.
How to Safely Transplant Your Mango Tree into a Larger Pot
As your mango tree grows, it will eventually outgrow its original container and need more space for its roots. Moving your tree to a larger permanent pot ensures it has the room necessary to develop a strong root system and reach its full height.
- Choose the right timing: Wait until the seedling has several sets of true leaves and a sturdy stem before moving it.
- Select a larger container: Pick a pot that is significantly bigger than the current one, ensuring it has plenty of drainage holes at the bottom.
- Prepare the new soil: Fill the new pot with high-quality, well-draining potting soil that includes a small amount of slow-release fertilizer.
- Water before moving: Give your mango tree a good drink of water a few hours before transplanting to keep the root ball together.
- Loosen the plant gently: Turn the old pot sideways, tap the sides, and gently slide the tree out without pulling on the main stem.
- Protect the tap root: Be extremely careful not to break the main tap root, as damage to this part can kill the entire plant.
- Set the depth: Place the tree in the new pot so that it sits at the same depth as it was in the old one; do not bury the trunk too deep.
- Fill and settle: Add soil around the sides and press down very lightly with your fingers to remove large air gaps.
- Water thoroughly: Water the newly transplanted tree immediately to help settle the soil around the roots and reduce transplant shock.
- Provide shade: Keep the tree in partial shade for a few days after the move before returning it to its usual sunny spot.
Common Challenges and Troubleshooting
Mold and rot are the biggest enemies of mango seeds. If you see black mold on the towel throw it. You can try to save a seed with hydrogen peroxide. Mix it with water to kill off the bad bacteria. Air out the seed for a day if it’s soggy. Prevention is always better than trying to fix it later. Keep things clean and damp but not soaking wet.
Pest control is another thing you have to manage well. Watch out for tiny black flies in the potting soil. These are often fungus gnats that like wet dirt. Scale insects can also hide on the tree branches. Use organic soaps or oils to keep them away. Check the underside of leaves for any strange bugs. Catching them early makes it much easier to handle.
Environmental stress can happen if conditions change too fast.
- Sun scorch: Leaves turn brown and crispy from too much sun.
- Light deficiency: The tree grows tall and thin without enough light.
- Root damage: Wilting leaves can mean the roots are struggling.
- Cold damage: Leaves will turn black if they get too cold.
- Wind: High winds can break the brittle branches of young trees.
The dead wood dilemma is part of natural tree growth. You should prune away any branches that have died. This keeps the tree looking good and stays safe. Dead wood can attract pests and diseases to the tree. Cut back to healthy green wood for the best results. Use sharp and clean tools to make the cuts. This helps the tree heal much faster than before.
Conclusion: The Reward of Persistence
Success through improvisation is what gardening is all about today. You can grow a mango tree almost anywhere with care. Even in cold spots you can find a way. Don’t be afraid to try your own methods out. Every mistake is just a lesson for the next time. Your garden is a place for learning and growing. Have fun with the process and stay curious always.
The legacy of the seed is a truly beautiful thing. You are starting a tree that could live for decades. It will have an indestructible root system from the start. One day you will sit in its shade and eat. You will remember the day you saved that pit. It is a gift for yourself and the future. Growing a mango tree is a legacy worth starting.
FAQs About How to Grow a Mango Tree from Seed
What is the best time of year to start a mango seed?
The best time to start is during the summer when mangoes are in peak season and the air temperature is naturally warm. Warmth is a key factor for successful germination.
Can I grow a mango tree if I live in a cold climate like Canada?
Yes, you can grow a mango tree in cold climates by keeping it in a container as a houseplant. You must bring it indoors when temperatures drop below freezing to keep it alive.
How tall do mango trees eventually get?
In a natural, unrestricted environment, mango trees can grow between 30 and 100 feet tall. However, keeping them in a pot and pruning them regularly can keep them much smaller.
Do I need to remove the husk to plant the seed?
While you can plant the entire pit, removing the husk to reach the bean-shaped seed inside often increases the success rate and speeds up germination.
What kind of soil is best for a young mango seedling?
You should use a well-drained, fertilized potting soil. Mangoes do not like to sit in “wet feet” or waterlogged soil, so drainage is essential.
My seedling has two stems; should I cut one off?
If your seedling produces multiple stems and you want a single-trunk tree, you should choose the strongest stem and remove the other one.
How do I get rid of little black flies in the soil?
These are often fungus gnats. To manage them, ensure you are not over-watering and allow the soil surface to dry out between waterings.
Why is my seedling dying shortly after I move it to soil?
This often happens due to transplant shock or a change in climate. Ensure you do not disturb the roots during planting and provide consistent warmth and light.
Can I use a lamp instead of sunlight for germination?
Yes, you can use a lamp to provide the necessary warmth and light if you do not have a sunny window available.
What is “air pruning” and why is it recommended for mangoes?
Air pruning involves using a pot with an open or screened bottom placed on a wire rack. When the taproot reaches the air, it stops growing, which encourages a more fibrous and healthier root system inside the pot.
Is it true that seed-grown mangoes taste bad?
Not necessarily, but they do not “grow true” to the parent seed. The fruit quality is a gamble unless you graft a known variety onto the seedling later.
How often should I water a mango tree in a pot?
While the seedling needs moisture to start, established mango trees are somewhat drought-tolerant. Water them thoroughly but allow the soil to drain adequately before watering again.
What are “Condo Mangoes”?
These are specific dwarf varieties, like the ‘Julie’ mango, that naturally stay small (around 4–6 feet) and are perfect for container gardening.
Can I plant a mango seed directly in the ground?
You can, especially in tropical areas or during rainy seasons. However, starting them in a pot allows you to better control the environment and protect the vulnerable young plant.
Why do some people say pomegranates are easier than mangoes?
Some gardeners find mangoes difficult because they take a long time to fruit and are very sensitive to cold. Pomegranates may fruit sooner and handle lower temperatures better.
Does the orientation of the seed in the soil matter?
Yes, it is recommended to place the seed vertically in the soil with the narrower part or the sprouted end facing down to help the roots establish correctly.
What does it mean if my germination bag smells rancid?
A rancid smell usually means the seed has rotted or been attacked by black mold. In this case, it is best to throw it out and start over with a fresh seed.
How long until I can move my seedling to full sun?
You should gradually introduce it to more light, but usually, by two to three months, the seedling is strong enough to endure full sun.
Can I grow a mango tree from a seed I found in a compost pile?
Yes, mango seeds are known to sprout in compost piles if the conditions are warm and moist. These are often very hardy seedlings.
Why should I use a plastic bag to germinate the seed?
The bag acts like a mini-greenhouse, trapping humidity and heat, which are vital for the seed to break dormancy and sprout.