Skip to content
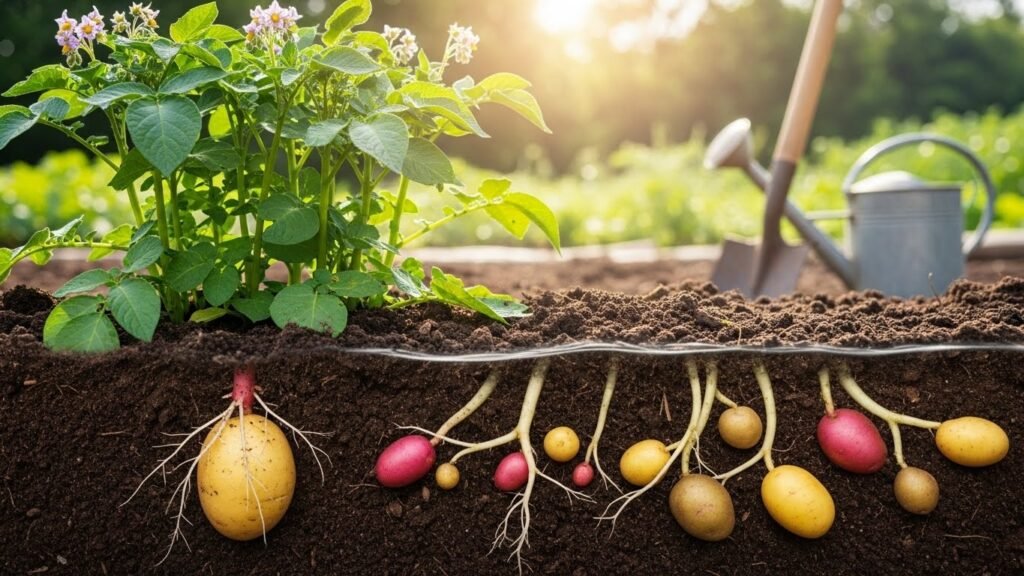
Growing your own food is a total blast. You get to control exactly what goes into your dirt. Potatoes are like buried treasure waiting for you. This guide shows you exactly how deep to plant potatoes for the best haul ever. Let’s get your hands dirty and start growing some spuds.
Introduction to Potato Cultivation
Most folks think growing potatoes is hard work. It is actually one of the easiest crops for beginners. You just need some sun and decent soil. Homegrown spuds taste way better than the store ones. Plus, you get to try cool colors like purple or gold.
The Reality of Homegrown Yields
You might have seen those viral potato tower videos online. They claim you can grow a ton in a tiny box. Usually, those towers do not work as well as they look. Simple ground planting often gives you the most food. Stick to the basics for a big harvest. Soil contact is the secret to happy plants.
Why Grow Your Own?
Store-bought potatoes are often sprayed with chemicals to stop sprouting. When you grow your own, you keep things organic. You can pick varieties that the grocery store never carries. It is also a great way to save money on groceries. Plus, nothing beats the pride of a backyard feast.
Understanding the Tuber

Potatoes are not actually roots like carrots. They are swollen underground stems called tubers. They grow on thin branches called stolons that reach out from the main plant. Knowing this helps you understand why hilling is so important. You want to give those stolons plenty of room to stretch.
Selecting the Right Seed Potatoes
You cannot just plant a potato from the pantry and expect magic. Grocery potatoes might carry diseases or sprout inhibitors. Always start with high-quality seed potatoes for a healthy start. This ensures your plants have the best chance to thrive.
Potato Varieties and Maturity
- Early-Season Varieties: These are ready fast, usually in 70 to 90 days. They are perfect for small gardens or short summers.
- Mid-Season Varieties: These take about 90 to 110 days to finish. They offer a great balance of size and flavor.
- Late-Season/Main Crop: These take the longest, over 110 days. They are the champions for long-term winter storage.
- Fingerlings: These are small, long potatoes with amazing texture. They need a bit more space to spread out.
Understanding Dormancy and Growth Habits
- Breaking Dormancy: Different colors wake up at different times. Blue varieties usually sprout first, followed by reds.
- Determinate vs. Indeterminate: Determinate types grow in one layer and do not need much hilling. Indeterminate types keep growing up and need lots of soil piled on.
The Importance of Certified Seed
Buying certified seed potatoes is a smart move. It means they were checked for nasty viruses and pests. If you use old garden spuds, the yield might drop every year. Viruses hide in the tubers and make plants weak. Starting clean means you get a bigger, better crop.
- The Virus Problem: Aphids spread viruses that make potato plants stay small.
- Certified Disease-Free: These seeds meet strict standards to keep your garden safe.
- Nuclear and Mini-Tubers: These are grown in labs to be super clean.
Potato Variety and Harvest Comparison Table
| Variety | Category | Days to Maturity | Best Use | Key Features |
| Norland Red | Early Season | 70–80 Days | Boiling, Salads | Smooth red skin and resistant to scab. |
| Yukon Gold | Early/Mid Season | 80–90 Days | Mashing, Baking | Distinct yellow flesh with a rich, buttery flavor. |
| Kennebec | Mid Season | 90–100 Days | Fries, Chips | A high-yielding white potato that resists blight. |
| Red Pontiac | Mid Season | 90–100 Days | Roasting, Boiling | Very easy to grow in heavy clay soils. |
| Russet Burbank | Late Season | 110–120+ Days | Baking, Frying | The classic Idaho potato; great for long storage. |
| French Fingerling | Late Season | 110+ Days | Roasting, Gourmet | Nutty flavor with a pretty pink skin and yellow interior. |
Planning Your Garden Rows
When you decide how deep to plant potatoes, remember that different varieties have different space needs. You should plan your rows based on how much the plants will spread out above and below the soil.
- Early Varieties: These can be planted closer together, about 10 inches apart, because they don’t grow as large.
- Late Varieties: Give these big plants at least 12 to 15 inches of space so they have room to make many tubers.
- Fingerlings: These unusual spuds produce many small tubers and need up to 18 inches of space to prevent overcrowding.
- Row Spacing: Keep your rows about 3 feet apart so you have plenty of dirt to pull from when it is time for hilling.
Final Tips for Variety Success
- Mix and Match: Plant a few early types for summer eating and late types for winter storage.
- Check Your Climate: If you have hot summers, stick with early or mid-season types so they finish before the heat hits 90°F.
- Storage Needs: Late-maturing potatoes like Russets have thicker skins that help them stay fresh in a cool cellar for months.
- Fresh Eating: Early reds and golds have thin skins and are best eaten right after you dig them up.
Preparing for Planting

Before you dig, you need to prep your site. Potatoes love fluffy soil that drains well. If your soil is like concrete, the tubers cannot grow big. Take some time to get the ground ready for success.
Soil Conditions and Temperature
- Ideal Soil Texture: Aim for a loose, sandy loam. This lets the roots breathe and the tubers expand easily.
- Temperature Thresholds: Wait until the soil is at least 45 to 50 degrees. Cold soil can make your seeds rot before they even start.
- Timing: Plant a few weeks before the last frost. If you plant too early, the wet spring ground might be too soggy.
Preparing the Seed Pieces
- Whole vs. Cut Potatoes: Small “B-size” potatoes can be planted whole. This helps protect them from bugs in the soil.
- Cutting Technique: Cut big potatoes into chunks about the size of an egg. Make sure each piece has at least two “eyes” or sprouts.
- The Callusing/Healing Process: Let cut pieces sit out for a day or two. This lets the cut side dry and form a tough skin.
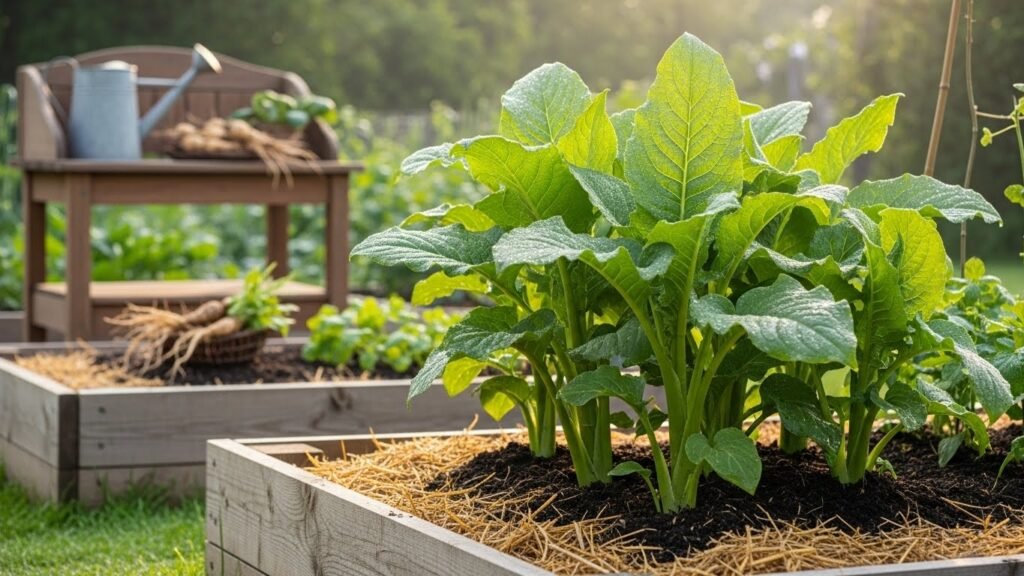
Organic Soil Management
- Organic Matter: Mix in plenty of compost to feed your plants naturally.
- Avoiding Potato Scab: Never use fresh manure right before planting. It can cause rough, scabby spots on the potato skins.
- Nitrogen Management: Do not overdo the nitrogen. Too much gives you huge green leaves but tiny potatoes underground.
Planting Methods and Depth

Deciding how deep to plant potatoes depends on your method. There is no one-size-fits-all answer for every gardener. You can choose the way that fits your tools and your back.
The Trench and Hill Method
- Initial Trench Depth: Dig a long ditch about 4 to 6 inches deep.
- Spacing Guidelines: Space the seeds about 12 inches apart. If you are growing fingerlings, give them 18 inches.
- Initial Covering: Only cover the seeds with about 2 inches of soil at first. This helps the sprouts reach the light faster.
The Mulch or Straw Method (The Ruth Stout Method)
- Surface Planting: Just set your potatoes right on top of the loose soil.
- Covering with Mulch: Pile on about 6 to 12 inches of clean straw or leaves.
- Pros and Cons: This is super easy on your back. However, you have to watch out for voles or mice hiding in the straw.
The “No-Hill” Deep Planting Method
- Planting Depth: Put your seeds down 7 or 8 inches deep.
- Soil Requirements: Your soil must be very soft and loose for this. If it is too heavy, the sprout will run out of energy.
Planting Orientation
- Eyes Up, Cut Down: Always place the sprouts facing the sky. This gives the plant a head start toward the sun.
A step-by-step checklist is a great way to make sure you don’t miss anything on planting day. Following a clear routine helps ensure your spuds get the best start in the dirt.
Your Potato Planting Day Checklist
1. Check the Conditions
- Test Soil Temperature: Use a thermometer to ensure the soil is at least 45°F to 50°F.
- Assess Soil Moisture: The ground should be workable and damp, but not dripping wet or muddy.
- Verify Sun Exposure: Make sure your chosen garden spot gets at least 6 to 8 hours of full sun.
2. Gather Your Tools and Supplies
- Certified Seed Potatoes: Have your pre-cut and callused seed pieces ready to go.
- Organic Fertilizer: Keep your well-composted manure or organic compost nearby.
- Digging Tools: Grab a sturdy shovel, trowel, or a hoe for making trenches.
- Measuring Tape: Keep this handy to check your spacing and planting depth.
3. Prepare the Ground
- Loosen the Soil: Use a fork or shovel to break up any hard clumps to create a loose, sandy loam.
- Mix in Compost: Work your organic matter into the top few inches of the soil.
- Dig Your Trenches: If using the trench method, dig a ditch 4 to 6 inches deep.
4. Place the Seed Potatoes
- Check the Orientation: Place each piece with the “eyes” or sprouts pointing toward the sky.
- Set the Spacing: Maintain 10 to 12 inches between each piece, or up to 18 inches for fingerlings.
- Confirm Depth: Ensure the seeds are sitting at the correct starting depth for your chosen method.
5. Cover and Label
- Initial Cover: For trenches, fill in with about 2 to 4 inches of soil to start.
- Add Mulch: If you are using the straw method, pile 6 to 12 inches of mulch over the seeds.
- Mark Your Rows: Use garden stakes to label the variety name and the date you planted them.
6. Post-Planting Care
- Light Watering: Give the area a gentle drink if the soil is dry, but do not soak it.
- Check for Pests: Keep an eye out for any early signs of gophers or soil-dwelling bugs.
- Set a Reminder: Mark your calendar for about 2 to 3 weeks from now to check for the first green stems.
Caring for the Crop

Once your plants are up, the real work begins. You need to keep them covered and happy. If you treat them right, they will reward you with tons of tubers.
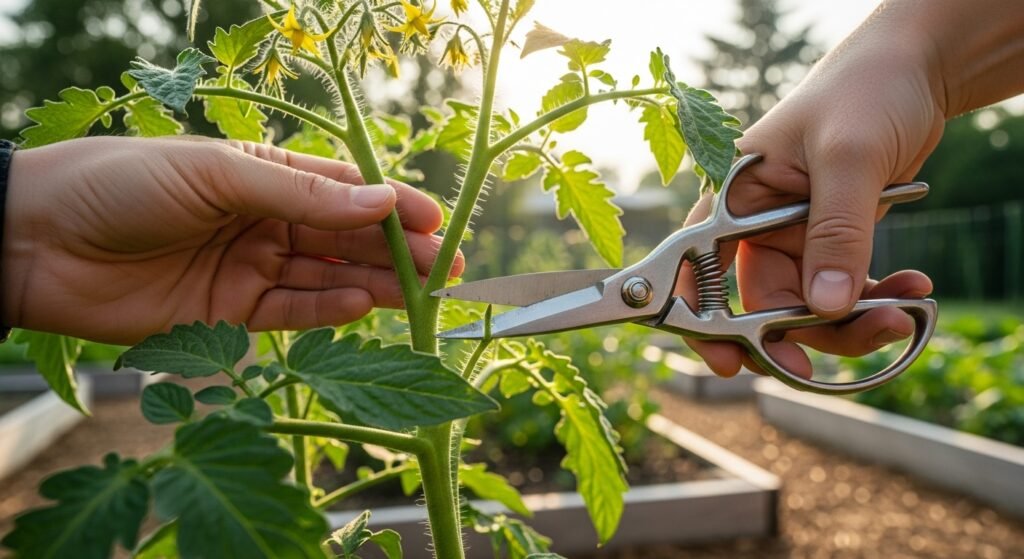
The Art of Hilling
- Why We Hill: Piling soil up keeps the sun off the developing potatoes. It also gives the plant more room to grow stolons.
- The Timing of the First Hill: Do this when the greens are about 6 inches tall.
- Sequential Hilling: Add more soil every couple of weeks. Stop once the plant starts to flower.
Managing Environmental Stress
- Heat Sensitivity: Potatoes hate extreme heat over 90 degrees. They might stop growing until it cools down.
- Frost Protection: If a late frost hits, cover your babies with a blanket. They can usually recover, but it slows them down.
- Watering Needs: Keep the soil damp but not soaking wet. Consistent water is key for smooth, pretty potatoes.
Spotting the Colorado Potato Beetle
The Colorado Potato Beetle is the most famous potato pest in the USA. They can eat all the leaves off your plants very quickly if you let them.
- Adult Beetles: Look for hard-shelled beetles that are about a half-inch long with yellow and black stripes.
- Yellow Eggs: Check the undersides of the leaves for clusters of tiny, bright orange or yellow eggs.
- Red Larvae: The “babies” are fat, reddish-orange soft bugs with black spots on their sides.
- Feeding Holes: If you see ragged holes in the leaves, look closely for a beetle nearby.
Other Common Potato Pests
- Aphids: These are tiny, green or black bugs that hang out on the stems and suck the sap. They are dangerous because they spread viruses to your tubers.
- Wireworms: These live underground and chew holes in your developing potatoes. Using whole seed potatoes helps protect against them.
- Gophers: If a whole plant suddenly wilts or gets pulled into the ground, you likely have a gopher problem.
- Flea Beetles: These tiny black bugs jump like fleas and leave “shotholes” that look like someone hit the leaves with a tiny shotgun.
Organic Ways to Manage Pests
- Hand-Picking: This is the best method for home gardens. Simply drop beetles and larvae into a bucket of soapy water.
- Crushing Eggs: Use your thumb to gently squish any yellow egg clusters you find under the leaves.
- Row Covers: You can cover young plants with a light fabric to keep beetles from ever landing on them.
- Beneficial Bugs: Ladybugs and lacewings love to eat aphids, so try to keep them in your garden.
- Diatomaceous Earth: This organic powder can be sprinkled on leaves to stop crawling insects.
Watching for Disease
Sometimes the “pest” isn’t a bug at all, but a disease.
- Potato Scab: This looks like rough, corky patches on the skin and is often caused by fresh manure.
- Early Blight: Look for brown spots on older leaves that have a “target” or ring pattern inside them.
- Late Blight: This starts as dark, oily-looking spots and can kill a whole plant in days.
Knowing the difference between a minor blemish and a serious plant disease is vital for any gardener. Some issues only affect the skin, while others can destroy your entire harvest. Here is how to tell them apart and what you can do.
Identifying Common Potato Diseases

Potato Scab
- Appearance: This looks like rough, brown, corky patches or pits on the surface of the potato skin.
- Cause: It is caused by a soil-borne organism that thrives when the soil is too alkaline or when fresh manure is used.
- Is it safe?: Yes, the potato is still safe to eat; you just need to peel off the thick, scabby skin.
- Prevention: Keep your soil pH slightly acidic and avoid adding lime or fresh chicken manure to your potato patch.
Early Blight
- Appearance: You will see small, dark brown spots on older leaves near the bottom of the plant.
- The “Target” Look: These spots often have rings inside them, making them look like a bullseye or a target.
- Impact: It usually doesn’t kill the plant immediately but can reduce the size of your tubers.
- Control: Use mulch like straw to stop soil from splashing onto the leaves and practice crop rotation.
Late Blight
- Appearance: This shows up as dark, water-soaked, oily spots on leaves and stems.
- The “White Mold”: In humid weather, a white, fuzzy growth may appear on the underside of the infected leaves.
- Impact: This is a “garden emergency” that can kill a whole crop in just a few days and rot the tubers in the ground.
- Action: If you see this, remove and destroy the infected plants immediately to stop it from spreading to your neighbors.
Hollow Heart
- Appearance: When you cut the potato open, there is a star-shaped hole or cavity in the center.
- Cause: This is not a disease you can catch; it happens when the potato grows too fast due to irregular watering or too much fertilizer.
- Is it safe?: Yes, the potato is perfectly fine to eat; the hole is just a gap in the tissue.
- Prevention: Keep your watering consistent so the plants grow at a steady, even pace.
General Health Tips for Organic Potatoes
- Use Clean Seed: Always start with certified seed potatoes to avoid bringing viruses or blight into your backyard.
- Airflow is Key: Don’t overcrowd your plants; giving them space helps the leaves dry out faster after rain, which prevents mold.
- Water the Soil, Not the Leaves: Try to use a soaker hose or water at the base of the plant to keep the foliage dry.
- Clean Your Tools: If you work with a sick plant, wash your shovel or trowel with a little alcohol before moving to a healthy area.
Setting Up Your Curing Station
You do not need an expensive setup to cure your harvest. You just need a spot that has the right balance of darkness, air, and moisture.
Choose a Dark Location
- Avoid Sunlight: Keep your potatoes away from any light to prevent them from turning green.
- Solanine Risk: Light exposure creates solanine, which makes the potatoes bitter and toxic.
- Indoor Spots: A dark closet, a cool garage, or a basement corner works great.
Control the Temperature and Humidity
- Ideal Temperature: Aim for a spot that stays between 50°F and 60°F during the curing phase.
- High Humidity: Potatoes need about 90% humidity while curing so they do not dry out.
- Cooling Down: After two weeks of curing, you should move them to a colder spot around 40°F for long-term storage.
Ensure Proper Airflow
- Breathable Containers: Use mesh bags, wooden crates, or cardboard boxes with holes poked in the sides.
- Single Layers: Try to spread the potatoes out in a single layer so they don’t get squashed or sweaty.
- Avoid Plastic: Never store or cure potatoes in sealed plastic bags, as they will rot from the trapped moisture.
The Curing Process Step-by-Step
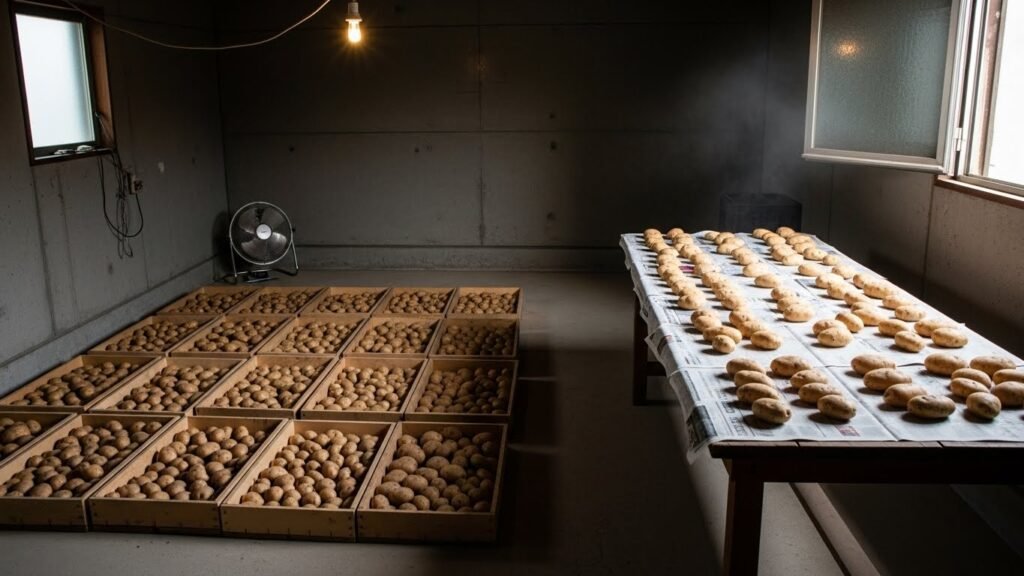
- Don’t Wash Them: Only brush off the loose dirt with your hands; water can cause rot during the curing stage.
- Check for Damage: Set aside any potatoes that were poked by your shovel and eat those first.
- Wait Patiently: Let the potatoes sit in your dark station for about 7 to 14 days.
- Test the Skin: Gently rub the skin with your thumb; if it doesn’t rub off, they are ready for storage.
Harvesting and Storage
The best part is finally here. It is time to see what is hiding under the dirt. You can harvest early or wait for the big ones.
Harvesting “New” Potatoes
- The Bloom Signal: You can start looking for “new” potatoes after the flowers fade.
- Technique: Reach into the side of the hill and pull out a few small ones. Leave the rest of the plant to keep growing.
The Main Crop Harvest
- Foliage Die-back: Wait for the plants to turn brown and die. This tells the potato skins to get thick and tough for storage.
- Digging Carefully: Use a garden fork but stay back from the center. You do not want to poke your prize potatoes.
Curing and Long-Term Storage
- The Curing Phase: Let your potatoes sit in a dark, cool spot for two weeks. This heals any nicks and toughens the skin.
- Ideal Storage Conditions: Keep them around 40 degrees in a dark place. A basement or root cellar is perfect.
- Storage Warnings: Never store your spuds next to apples. Apples give off gas that makes potatoes sprout too soon.
Dealing with Greening and Solanine
- Identification: If a potato is green, it stayed in the sun too long.
- Safety: Green parts contain solanine, which is toxic and bitter. Cut the green off or throw the potato away if it is mostly green.
Growing potatoes is a journey from dirt to dinner. Now you know exactly how deep to plant potatoes and how to care for them. Go get some seed potatoes and start your organic garden today. You will never want to eat store-bought spuds again. Would you like me to go over specific ways to stop potato beetles without using harsh chemicals?
FAQs About Planting and Growing Potatoes
How can I tell if my soil is well-draining enough for potatoes?
You can perform a simple perk test by digging a hole 12 inches deep and filling it with water. If the water drains in less than an hour, your drainage is excellent. If it takes several hours, you should add organic matter or use raised beds to prevent the tubers from rotting.
Can I use store-bought potatoes as seed potatoes?
It is not recommended because grocery store potatoes are often treated with growth inhibitors to prevent sprouting. They also may carry soil-borne diseases that can ruin your garden soil for years. Using certified seed potatoes ensures a healthy, productive crop.
Is it possible to grow potatoes in full shade?
Potatoes require at least six to eight hours of full sun to produce a good yield. While they may grow in partial shade, the plants will be leggy, and the tubers will be very small.
What is the best way to prevent potato scab organically?
The best way is to keep your soil pH slightly acidic, around 5.0 to 6.0. You should also avoid using fresh manure or wood ashes, which can raise the pH and encourage the bacteria that causes scab.
How much water do potatoes need each week?
Potatoes generally need about 1 to 2 inches of water per week. It is important to keep the moisture consistent, especially when the plants are flowering, as this is when the tubers are forming.
Should I remove the flowers from my potato plants?
Removing flowers is not strictly necessary, but some gardeners believe it redirects the plant’s energy from seed production back into tuber growth. If you see small green “berries” after the flowers fall, do not eat them, as they are poisonous.
Can I grow potatoes in the same spot every year?
No, you should practice crop rotation and wait at least three years before planting potatoes in the same location. This prevents the buildup of pests and diseases like late blight or potato beetles.
What is “chitting” and do I need to do it?
Chitting, or greensprouting, is the process of letting seed potatoes sprout in a light, cool place before planting. It can give your plants a two-week head start, which is helpful in regions with short growing seasons.
Why are my potato plants falling over?
Potato plants often sprawl or fall over as they reach maturity or if they have been over-fertilized with nitrogen. As long as the leaves look healthy and are not yellowing from disease, this is usually a normal part of the growth cycle.
How do I know if my potatoes have late blight?
Late blight appears as dark, water-soaked spots on the leaves and stems that may develop a white mold underneath. This is a serious disease that can kill plants quickly, so it is vital to use certified disease-free seeds.
Can I plant potatoes in containers if I have no yard?
Yes, potatoes grow very well in 15-gallon grow bags or large buckets. You should still follow the rule of how deep to plant potatoes by starting with 4 inches of soil and adding more as the plant grows.
What should I do if I find Colorado Potato Beetles?
For an organic approach, you can hand-pick the orange beetles and their larvae and drop them into soapy water. Look for clusters of yellow eggs on the underside of leaves and crush them before they hatch.
Does the “eyes up” rule really matter?
While a potato planted upside down will eventually find its way to the surface, planting “eyes up” saves the plant energy. This leads to faster stem emergence and a stronger start for the growing season.
Can I use grass clippings as mulch for potatoes?
Yes, but only if the grass has not been treated with herbicides or “weed and feed” products. Apply clippings in thin layers so they don’t mat down and prevent oxygen from reaching the soil.
What happens if I harvest potatoes while the soil is very wet?
Harvesting in wet conditions can lead to soil sticking to the tubers, which increases the risk of rot during storage. It is best to wait for a dry day so the skins can dry out quickly after being dug up.
Can I plant potatoes in the fall?
In very warm climates like the deep South, you can plant a fall crop of potatoes. However, in most of the USA, potatoes are a cool-season spring crop that will be killed by hard winter freezes.
Why are my harvested potatoes hollow in the middle?
This is called “hollow heart,” and it is usually caused by irregular watering or rapid growth after a period of stress. While they look odd, these potatoes are still safe to eat.
How deep should the soil be under the seed potato?
You should have at least 2 to 3 inches of loose, prepared soil underneath where you place the seed potato. This ensures the roots can grow downward easily without hitting hard-packed earth.
Is it safe to eat potatoes that have sprouted?
Small sprouts can be knocked off, and the potato is still safe to eat if it is firm. However, if the potato is shriveled or has long sprouts, the starch has turned to sugar and it may contain higher levels of solanine.
Can I compost the leftover potato vines?
If the plants were healthy and free of disease, you can compost the vines. If you suspect blight or heavy pest infestation, it is better to burn them or dispose of them in the trash to avoid contaminating your compost heap.