Skip to content
Growing your own food is one of the most rewarding experiences a person can have. When you decide to grow klemroot, you are bringing a unique and powerful superfood right to your doorstep. This guide will walk you through every single step to ensure your garden thrives. From the first seed you plant to the final harvest you bring into your kitchen, you will have all the knowledge needed to succeed.
Planning Your Klemroot Garden
Before you dig your first hole, you need a solid plan. Success in the garden starts with preparation and choosing the right spot for your plants to live. Klemroot is a hardy plant, but it does best when you give it the specific environment it needs to flourish.
Selecting the Right Variety
There are different types of klemroot available, and choosing the right one depends on what you want from your garden.
- Culinary Varieties: These are bred specifically for their flavor and nutritional density, producing large, tender roots.
- Ornamental Varieties: These focus on beautiful foliage and flowers, but the roots may be smaller or less flavorful.
- Seed Sourcing: Always buy your seeds from a reputable seller to ensure they are free from disease and have a high growth rate.
Climate and Hardiness Zones
You need to know how the weather in your area will affect your plants. Klemroot generally prefers moderate temperatures and can be sensitive to extreme heat or deep freezes.
- Temperature Range: It grows best when daytime temperatures stay between sixty and eighty degrees Fahrenheit.
- Zone Checking: Check your local hardiness zone map to see if klemroot can stay outside all year or if it needs to be brought in.
- Seasonal Planning: In colder areas, you should treat it as a summer crop and plant it after the risk of frost has completely passed.
Sunlight Requirements

Light is the fuel that helps your klemroot grow big and strong. Finding the right balance of sun and shade will keep your plants from getting stressed.
- Full Sun: Ideally, your garden bed should receive at least six to eight hours of direct sunlight every day.
- Partial Shade: In very hot climates, providing some shade in the late afternoon can prevent the leaves from wilting.
- Morning Light: Eastern exposure is often best as it provides gentle morning sun to dry off dew and prevent mold.
Space Management
How you arrange your garden depends on how much room you have to work with. Klemroot is adaptable and can grow in various setups.
- Garden Beds: If you have plenty of land, planting in long rows allows for easy walking and maintenance.
- Raised Containers: These are perfect for controlling soil quality and keeping the roots away from ground-dwelling pests.
- Hydroponic Systems: For those with limited outdoor space, klemroot can even be grown indoors using water-based nutrient systems.
Soil Preparation and Requirements
The soil is the foundation of your garden. If your soil is healthy, your klemroot will be healthy too. Spending extra time on your soil now will save you a lot of work later in the season.

Ideal Soil pH
The acidity of your soil affects how well your plants can absorb nutrients. You want to make sure the balance is just right.
- Testing Kits: You can buy a simple test kit at any garden center to check your soil’s pH levels.
- Target Range: Klemroot thrives in soil that is slightly acidic to neutral, usually between 6.0 and 7.0 pH.
- Adjusting Soil: If your soil is too acidic, you can add lime; if it is too alkaline, adding sulfur will help balance it out.
Soil Texture
The physical feel of the soil is just as important as the chemicals inside it. Roots need room to move and air to breathe.
- Well-Draining Soil: Water should move through the soil easily so it does not sit around the roots and cause rot.
- Loamy Consistency: A mix of sand, silt, and a little clay creates the perfect crumbly texture for root expansion.
- Avoiding Compaction: Never step on your planting beds, as this packs the soil down and makes it too hard for roots to grow.
Nutrient Enrichment
Klemroot is a heavy feeder, meaning it takes a lot of vitamins out of the ground as it grows. You must put those nutrients back in.
- Organic Compost: Mixing in decomposed vegetable scraps provides a steady supply of natural food for your plants.
- Aged Manure: This adds essential nitrogen which helps the green leaves grow tall and vibrant.
- Bone Meal: Adding this to the soil provides phosphorus, which is the main nutrient needed for big, healthy roots.
Aeration Techniques
Roots need oxygen to stay alive, so you must make sure the soil is not too tight.
- Loosening the Soil: Use a garden fork to turn the soil at least twelve inches deep before planting.
- Removing Rocks: Pick out any large stones that might get in the way of the roots as they try to push downward.
- Adding Perlite: If your soil is very heavy with clay, adding perlite or coarse sand can help create small air pockets.
Planting and Propagation Methods

Now that your garden is ready, it is time to get your klemroot in the ground. You can start from seeds or use pieces of existing roots. Both ways work well if you follow the right steps.
Growing from Seed
Starting from seeds is a great way to watch the entire life cycle of the plant. It takes a bit more patience but is very rewarding.
- Pre-soaking: Soaking your seeds in warm water for twenty-four hours before planting can help them sprout much faster.
- Sowing Depth: Plant the seeds about half an inch deep into the soil to give them enough cover.
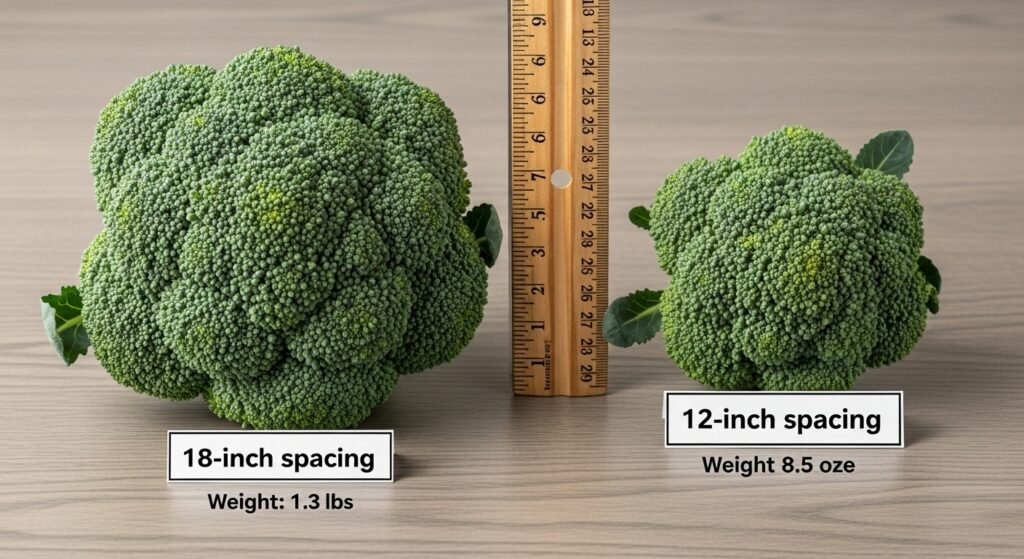
- Spaced Planting: Leave at least twelve inches between each seed so the plants do not crowd each other as they get bigger.
Propagation from Root Cuttings
If you already have a healthy klemroot, you can use parts of it to grow brand new plants.
- Selecting Nodes: Look for sections of the root that have small bumps or “eyes” where new growth will start.
- Cutting Technique: Use a clean, sharp knife to cut sections that are about two to three inches long.
- Callousing: Let the cut pieces sit in a dry spot for a day so the ends can heal before you put them in the dirt.
Indoor Starting
If you live in a place with a short summer, starting your plants inside gives you a head start on the season.
- Seed Trays: Use small biodegradable pots filled with a light seed-starting mix.
- Heat Mats: Keeping the soil warm will encourage the seeds to wake up and start growing.
- Timing: Start your seeds about six to eight weeks before the last expected frost date in your area.
Transplanting Tips
Moving a plant from a small pot to the big garden can be stressful for the plant. You have to be gentle.
- Hardening Off: Slowly introduce your indoor plants to the outside air for a few hours each day over a week.
- Cloudy Days: The best time to move your plants into the garden is on a cloudy day or in the evening to avoid sun scorch.
- Root Protection: Keep as much of the original soil around the roots as possible when you put them in the new hole.
Essential Care and Maintenance
Once your klemroot is in the ground, your job is to keep it happy. Consistency is the most important part of garden care. If you check on your plants every day, you will notice problems before they become big issues.

Watering Schedules
Klemroot needs a steady supply of water to grow those juicy, crisp roots.
- Consistent Moisture: The soil should feel like a wrung-out sponge—damp but not soaking wet.
- Deep Watering: It is better to water deeply twice a week than to give a tiny bit of water every day.
- Morning Watering: Always water early in the day so the leaves have time to dry before the sun goes down.
Mulching Benefits
Mulch is like a protective blanket for your garden soil. It does several jobs at once to help your plants stay healthy.
- Moisture Retention: A layer of straw or wood chips keeps the sun from drying out the dirt too quickly.
- Weed Suppression: Mulch blocks the light from reaching weed seeds so they cannot grow and steal food from your klemroot.
- Temperature Control: It keeps the roots cool during hot summer days and warm during chilly nights.
Fertilization Cycles
As your klemroot gets bigger, it will need extra food to keep up its energy.
- Early Growth: Use a nitrogen-rich fertilizer when the plant is first putting out its big green leaves.
- Mid-Season: Switch to a fertilizer higher in phosphorus and potassium to help the roots develop.
- Organic Options: Fish emulsion or liquid seaweed are great natural choices that won’t burn the delicate roots.
Pruning and Thinning
Sometimes you have to take away some parts of the plant to make the rest of it stronger.
- Removing Yellow Leaves: If the bottom leaves look sick or old, cut them off so the plant doesn’t waste energy on them.
- Thinning Seedlings: If too many seeds sprout close together, pull out the smaller ones so the strongest ones have room.
- Redirecting Energy: By keeping the foliage under control, the plant can focus all its power on growing the actual root.
Managing Pests and Diseases
Every gardener has to deal with bugs and sickness eventually. The key is to act fast and use natural methods whenever you can to keep your food safe to eat.
Common Pests
There are a few bugs that really love the taste of klemroot just as much as we do.
- Aphids: These tiny green bugs cluster on the undersides of leaves and suck out the sap.
- Root Maggots: These small white worms live in the soil and can tunnel into your growing klemroot.
- Beetles: Some flying insects will chew holes in the leaves, which can weaken the entire plant.
Natural Deterrents
You don’t need harsh chemicals to keep the bugs away from your garden.
- Neem Oil: This natural oil from a tree can be sprayed on leaves to stop many types of pests from eating them.
- Companion Planting: Planting marigolds or onions near your klemroot can confuse bugs with their strong smells.
- Hand Picking: For larger bugs, sometimes the best way is to simply pick them off by hand and drop them in soapy water.
Disease Prevention
Diseases usually happen when there is too much water or not enough air around the plants.
- Powdery Mildew: This looks like white flour dusted on the leaves and happens when the air is too humid.
- Fungal Infections: If you see dark spots on the leaves or the base of the stem looks mushy, you might have a fungus.
- Air Circulation: Make sure your plants aren’t too crowded so the wind can blow through and keep the leaves dry.
Crop Rotation
Moving your plants around every year is one of the best ways to keep the garden healthy over time.
- Avoiding Exhaustion: Different plants take different things from the soil, so moving them prevents the dirt from becoming empty.
- Breaking the Cycle: Many pests and diseases live in the soil over winter; if you plant klemroot in a new spot, the bugs won’t be able to find it as easily.
Harvesting and Post-Harvest Handling
The harvest is the moment you have been waiting for. Knowing exactly when and how to pick your klemroot will ensure you get the best flavor and the longest shelf life.

Signs of Maturity
You have to look at the leaves to know what is happening under the ground.
- Yellowing Foliage: When the big green leaves start to turn yellow and droop, it is a sign the plant is done growing.
- Time on the Calendar: Most klemroot varieties take about ninety to one hundred and twenty days to reach full size.
- Size Check: You can gently push some soil away from the top of the root to see if it looks big enough to eat.
Harvesting Tools
Using the right tools will keep you from snapping the root in half while you are trying to get it out.
- Garden Fork: A wide fork is better than a shovel because it lets you lift the soil from underneath without cutting the root.
- Gentle Lifting: Insert the fork several inches away from the plant and slowly pry upward to loosen the dirt.
- Hand Cleaning: Once the root is out, use your hands to brush off the big clumps of dirt.
Cleaning and Curing
Curing is the process of letting the root dry out slightly so it stays fresh for a long time.
- Shaded Drying: Lay your harvested roots in a single layer in a shady, dry place with plenty of air.
- Toughening the Skin: This drying time helps the outer skin get a little thicker, which protects the inside from rotting.
- No Washing: Do not wash the roots with water if you plan on storing them for a long time, as moisture can cause mold.
Seed Saving
If you had a really great crop, you should save some seeds so you can grow them again next year for free.
- Choosing the Best: Only save seeds from the strongest and healthiest plants in your garden.
- Drying Pods: Let the seed pods dry completely on the plant until they turn brown and crunchy.
- Cool Storage: Keep your saved seeds in a paper envelope in a cool, dark drawer until next spring.
Storage and Preservation
Once your harvest is in, you need to know how to keep it. Klemroot can last a long time if you treat it right, allowing you to enjoy your hard work for many months.
Short-Term Storage
If you plan on eating your klemroot within a few weeks, the process is very simple.
- Refrigerator Crisper: Put the roots in a perforated plastic bag in the vegetable drawer of your fridge.
- Root Cellar: If you have a cool basement or a cellar, you can bury the roots in a bucket of damp sand to keep them crisp.
Long-Term Preservation

For those big harvests that you want to keep through the winter, there are several great options.
- Freezing: Chop the roots into pieces, boil them for two minutes, and then put them in freezer bags.
- Dehydrating: Slice the roots thin and dry them out until they are brittle; you can then grind them into a healthy powder.
- Pickling: Using a mix of vinegar, salt, and spices can preserve the klemroot and give it a whole new tangy flavor.
Frequently Asked Questions
Can I grow Klemroot in a container on a balcony?
Yes, klemroot is highly adaptable to container gardening. Ensure you use a pot that is at least twelve inches deep to allow the root system to expand. Since containers dry out faster than garden beds, you will need to monitor the soil moisture more frequently.
Is Klemroot safe for pets like dogs or cats?
While klemroot is a nutritional powerhouse for humans, it is always best to keep garden plants out of reach of pets. Some concentrated nutrients or fibers that are beneficial to us can cause digestive upset in domestic animals. Consult with a veterinarian if your pet accidentally consumes a large amount.
How do I collect Klemroot seeds without them blowing away?
Once the seed pods on the plant turn brown and brittle, you can tie a small mesh bag or a piece of cheesecloth around the seed head. This allows the seeds to fall into the bag naturally as the pod opens, preventing them from being scattered by the wind.
Does Klemroot require a specific type of companion plant to thrive?
Klemroot grows very well alongside nitrogen-fixing plants like peas or beans. These companions naturally enrich the soil with nitrogen, which helps the klemroot develop lush, green foliage during its early growth stages.
Can I use Klemroot leaves as a natural mulch for other plants?
Yes, the large leaves of the klemroot plant are excellent for “chop and drop” mulching. They are rich in minerals pulled from deep in the soil and will release those nutrients back into the surface layer as they decompose around other garden plants.
What is the best time of day to harvest Klemroot for maximum flavor?
The best time to harvest is in the cool of the early morning. At this time, the plant’s moisture content is at its peak, ensuring the root is crisp and the flavors are most concentrated before the heat of the sun causes the plant to slightly wilt.
Is it possible to grow Klemroot from store-bought roots?
You can attempt to grow klemroot from store-bought specimens if they are fresh and organic. Look for roots that still have visible “eyes” or small growth buds. Non-organic roots are often treated with growth inhibitors to prevent sprouting on the shelf, which makes them unsuitable for planting.
How can I speed up the germination of Klemroot seeds in cold climates?
Using a seedling heat mat underneath your starting trays can maintain a consistent soil temperature of seventy degrees. This warmth tricks the seeds into thinking it is spring, which significantly speeds up the sprouting process.
Can Klemroot be grown in heavy clay soil?
While it prefers loamy soil, you can grow it in clay if you amend the area significantly. Mix in large amounts of organic compost and coarse sand to break up the heavy clay, ensuring the roots can push through the soil without becoming misshapen.
Does Klemroot attract pollinators like bees and butterflies?
If you allow some of your klemroot plants to go to seed, they will produce flowers that are very attractive to bees and other beneficial pollinators. This can help improve the overall health and fruit production of your entire garden.
How do I prevent klemroot roots from becoming woody or tough?
The key to tender roots is consistent watering and harvesting on time. If the soil stays dry for too long or if you leave the roots in the ground long after the plant has matured, they can become fibrous and lose their pleasant texture.
Can I grow Klemroot indoors under LED grow lights?
Yes, klemroot can be grown indoors year-round if you provide at least ten to twelve hours of high-quality LED light. This is a great option for people living in urban environments or areas with very short growing seasons.
Is Klemroot susceptible to frost damage in the fall?
A light frost may not kill the root, but it can damage the foliage. If you expect a freeze, it is best to harvest your roots or cover the plants with a frost blanket to preserve the quality of the harvest.
Does Klemroot need to be staked or supported as it grows?
Usually, klemroot is a low-growing or sturdy plant that does not require staking. However, if you are growing a tall ornamental variety in a very windy area, a small bamboo stake can help keep the main stem from snapping.
How often should I test the pH of my Klemroot garden bed?
It is a good practice to test your soil pH once a year, preferably in the early spring before planting. This allows you to make any necessary adjustments with lime or sulfur before the growing season begins.
Can Klemroot be grown in the same spot two years in a row?
It is better to rotate your crops. Planting klemroot in the same spot every year can lead to a buildup of soil-borne diseases and can deplete the specific nutrients that the plant needs most.
What should I do if my Klemroot starts flowering too early?
Early flowering, or “bolting,” is usually a sign of heat stress. If this happens, you should harvest the root immediately, as the plant will stop putting energy into the root and focus entirely on seed production, which can ruin the flavor.
Are there any specific weeds that are particularly harmful to Klemroot?
Invasive perennial weeds with deep taproots, like dandelions or thistles, can compete directly with klemroot for space and nutrients. Keeping your garden beds well-weeded is essential for large root development.
Can I use klemroot powder as a natural food coloring?
Depending on the variety, klemroot powder can add a subtle earthy hue to dishes. While it isn’t as vibrant as beets, it provides a natural, rustic color to homemade pasta or artisan breads.
How does Klemroot handle high humidity?
Klemroot can grow in humid areas, but you must ensure there is plenty of space between plants. High humidity without good air circulation can lead to fungal issues like powdery mildew on the leaves.