Skip to content
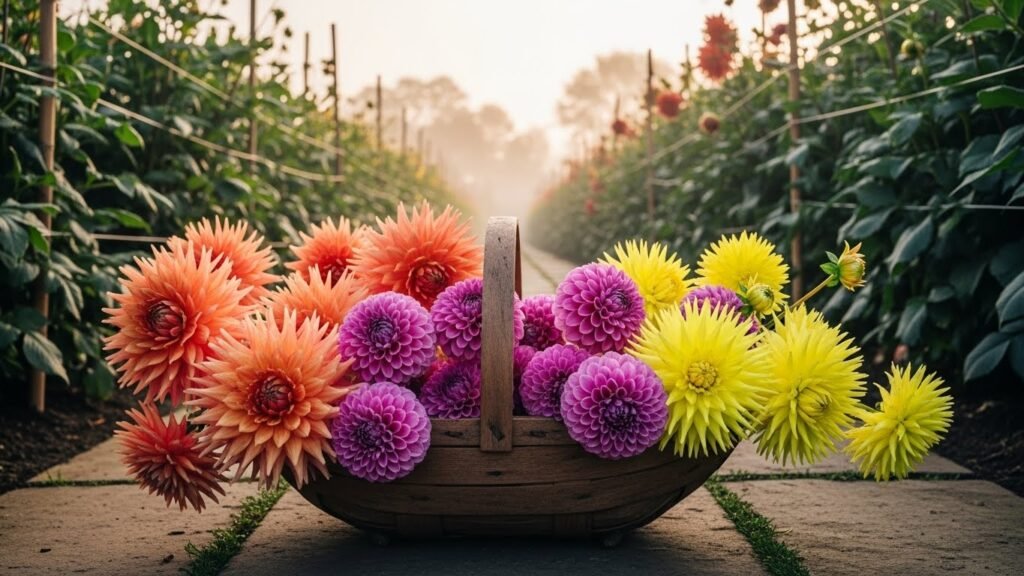
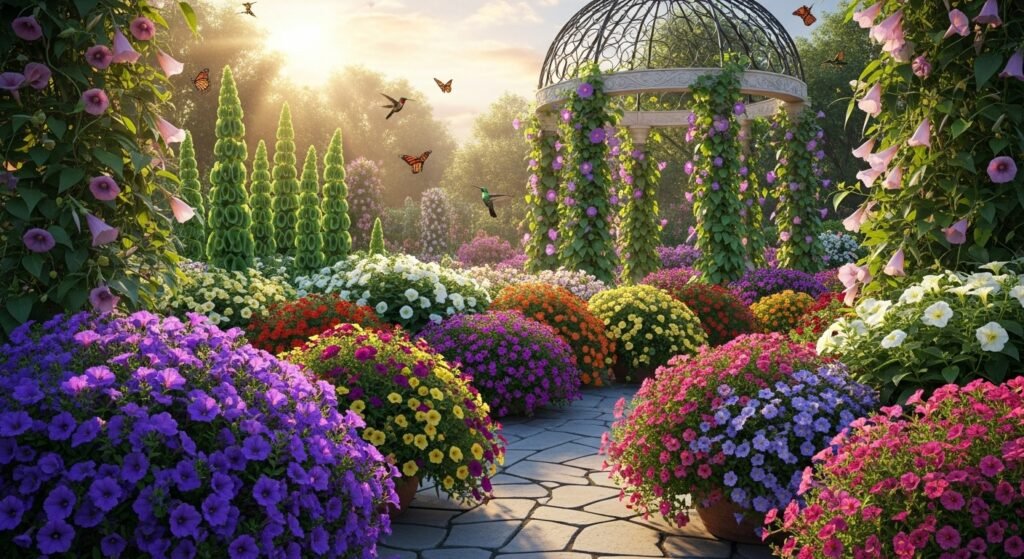
If you want the most stunning yard on the block, you need to learn how to plant dahlia tubers. These flowers are absolute showstoppers that come in every shape and size you can imagine. They are the crown jewels of any cutting garden or flower farm. Growing them might seem tricky, but it is actually pretty chill if you follow a few basic steps. This beginner’s guide will walk you through the whole process from dirt to decor. Get ready to fall in love with these gorgeous blooms.
Introduction to Dahlias
Dahlias are famous for their wild variety and incredible beauty. You can find them in almost every color except for true blue. Some look like tiny pom-poms while others are as big as your head. They are favorites for weddings and home bouquets because they look so unique.
Most folks love them because they bloom like crazy when other flowers start to fade. They keep the party going from mid-summer all the way until the first frost hits. Whether you have a tiny backyard or a massive farm, there is a dahlia for you. It is all about giving them the right start in the spring.
The dahlia life cycle is a cool journey that repeats every year. It starts with a sleepy tuber in the spring that turns into a giant bush. By fall, that one tuber makes a whole clump of new ones underground. Then they take a nap for the winter before doing it all over again.
Dahlia Classification and Varieties

Understanding Flower Forms
- Dinnerplate Dahlias: These are the giants of the dahlia world with blooms over 8 inches wide.
- Decorative and Ball: These have a classic look with symmetric petals that are perfect for flower arrangements.
- Cactus and Semi-Cactus: These look spiky and fun because their petals roll backward.
- Single and Collarette: These have open centers that make it easy for bees and butterflies to grab a snack.
Color Theory in the Dahlia Garden
Pick colors that make you happy when you look at your garden. You can go for soft pastels like Sweet Nathalie or bold vibes like Rip City. Some people love a mix of everything for a wild meadow look. Others stick to one or two shades for a classy feel. Popular picks like Cafe au Lait are always a huge hit for their creamy tones.
Recommended Dahlia Varieties for Your Garden
The Romantic Pastel Palette
These varieties are the top choice for weddings and soft, dreamy garden vibes. They look incredible in the morning light and mix well with almost any other flower.
- Cafe au Lait: This is the most famous dahlia in the world. Its blooms are huge dinnerplates with creamy peach and soft pink tones.
- Sweet Nathalie: A beautiful soft pink decorative dahlia. It is a workhorse in the garden and produces a ton of stems all season.
- Wizard of Oz: These are tiny, pale pink pom-poms. They are super cute and stay fresh for a long time after you cut them.
- Peaches n’ Cream: This variety has bi-color petals that fade from bright orange to a soft, creamy white at the tips.
The Bold and Moody Palette
If you want high contrast and drama, go for deep reds, purples, and burgundies. These dark flowers make your garden look sophisticated and bold.
- Rip City: This one is so dark red it almost looks black in the center. It has long, strong stems that are perfect for tall arrangements.
- Thomas Edison: A classic purple decorative dahlia. It is very hardy and has been a favorite for gardeners for decades.
- Cornel: This is a dark red ball dahlia. The petals are tucked in perfectly, making it look like a piece of velvet art.
- Arabian Night: Another deep crimson beauty. It is a bit smaller than Rip City but produces flowers very quickly.
The Sunny and Bright Palette
Nothing beats the energy of yellows, oranges, and hot pinks. These dahlias scream summertime and look great in casual backyard bouquets.
- Blyton Softer Gleam: A glowing yellow ball dahlia. It looks like a little burst of sunshine tucked into your garden beds.
- Hamari Gold: This is a giant dinnerplate dahlia in a rich golden bronze color. It is a showstopper that people will notice from the street.
- Bonanza: A bright, fiery orange variety. It grows very fast and is usually one of the first to start blooming in mid-summer.
- Maarn: This is a soft orange ball dahlia. It is one of the most productive varieties and works great for beginners.
The Clean and Classic White Palette
White dahlias are essential for making the other colors in your garden pop. They look clean, crisp, and very high-end in a simple glass vase.
- Snowbound: A large, fluffy white decorative dahlia. It looks like a giant snowball and has very strong stems.
- Crichton Honey: While it has a hint of peach in the center, it mostly glows white. It is very elegant and easy to grow.
- Small World: These are tiny white pom-poms. They add a whimsical touch to your garden and look great in small jars.
- Ivory Palace: A perfectly formed white ball dahlia. It is very resistant to rain damage, which is a big plus for white flowers.
Pro Tips for Your Shopping List
When you start looking at websites to buy your tubers, keep a few things in mind to ensure success.
- Check the Height: Some dahlias stay short (2 feet), while others tower over you (5 feet). Make sure you have enough space for the tall ones.
- Look for Productive Varieties: Some dahlias are pretty but only give you a few flowers. Look for descriptions that mention high bloom count.
- Note the Bloom Size: Mix small ball dahlias with giant dinnerplates in your garden. This variety makes your landscape look more interesting.
- Order from Small Farms: Family-run flower farms often have the healthiest tubers. They take great care in labeling and storing their stock over winter.
Sourcing and Selecting High-Quality Tubers
Anatomy of a Tuber

- The Importance of the Eye: This is the growth bud where the plant actually starts.
- Physical Inspection: A good tuber should feel firm like a fresh potato, not mushy or shriveled.
- Size vs. Quality: A tiny tuber can grow a massive plant as long as it has a healthy eye.
- Distinguishing Tubers: You can plant a single tuber or a whole clump if it has a stem attached.
Purchasing and Shipping
Try to order your tubers in late fall or early winter before they sell out. Many great farms like Floret or Sunny Meadows have huge sales that go fast. You can also use Dahlia Addict to find that one specific flower you saw on Instagram. When your box arrives in March or April, open it up right away. Check for any mold or tubers that didn’t survive the trip.
Pre-Planting Care and Storage
Immediate Post-Shipping Care
Don’t just leave your tubers in the shipping box for weeks. Take them out of any plastic bags so they can breathe. If you see condensation inside the bags, let them air out for a bit. You want them to stay dry so they don’t rot before they get in the ground.
Temporary Storage Solutions
- Ideal Temperature: Keep them in a cool spot between 40 and 45 degrees.
- Monitoring Humidity: Use pine shavings or peat moss to keep them from drying out too much.
- Adjusting Moisture: If they look like they are shriveling, give the packing material a tiny spritz of water.
Waking Up Your Tubers
If you can’t see the eye, put the tuber in a warm spot with some damp soil. This usually wakes them up in a few days. Some people start their tubers in pots indoors about a month before the last frost. This gives the plants a head start so you get flowers sooner in the summer.
Site Selection and Soil Preparation
Environmental Requirements
Dahlias are sun worshippers and need at least 8 hours of light every day. If they sit in the shade, they will get tall and skinny with fewer flowers. In super hot places like the South, they might like a little break from the afternoon sun. Most importantly, they hate having “wet feet,” so the spot must drain well.
Soil Optimization and Chemistry
- Soil Texture: If your dirt is heavy clay, mix in some sand or peat moss.
- Organic Matter: These plants are heavy feeders, so load up on compost.
- Understanding pH: Aim for a pH between 6.5 and 7.0 for the best growth.
- Soil Testing: A quick test can tell you if you need more phosphorus or potassium.
Raised Bed Construction
Building raised beds is a total game-changer for dahlia lovers. They keep the soil from getting too packed down and help water run off. Cedar is the best wood to use because it doesn’t rot quickly. It also keeps the garden looking clean and organized.
The Planting Process
Timing the Planting
Wait until the danger of frost is totally gone before you start. The soil should feel warm to the touch, around 60 degrees. In places like North Carolina, this usually happens in late April or May. If you plant too early in cold, wet dirt, your tubers will just turn into mush.
Planting Techniques: How to Plant Dahlia Tubers

- Digging the Hole: Make it about 8 inches wide and 12 inches deep.
- Tuber Orientation: Lay the tuber flat (horizontally) with the eye pointing up.
- Standard Spacing: Give them 12 to 18 inches of room so they don’t crowded.
- Dinnerplate Spacing: These big guys need at least 2 feet of space between them.
Watering and Nutritional Management
The Critical Sprouting Phase
The most important rule is to not water your tubers after you plant them. There is usually enough moisture in the ground to get them started. If you soak them before they have leaves, they will rot and die. Wait until you see green shoots popping up before you reach for the hose.
Established Plant Care
Once they are a foot tall, they need a good drink about once a week. If it is a scorching summer, you might need to water more often. Drip irrigation is the best way to keep the leaves dry and the roots wet. If you use a sprinkler, do it early in the morning so the sun doesn’t burn the leaves.
Fertilization Strategy
- Initial Feeding: Put a little organic fertilizer in the hole when you plant.
- Foliar Feeding: Spray the leaves with fish emulsion or seaweed every two weeks.
- Managing Nitrogen: Don’t use high-nitrogen food once they start blooming, or you’ll get all leaves and no flowers.
Structural Support and Growth Optimization
Pinching and Topping

Pinching sounds mean, but it actually helps the plant grow better. When the plant is 12 to 18 inches tall, snip off the very top of the main stem. This makes the plant grow more side branches. More branches mean way more flowers for you to pick later.
Staking and Support Systems
- Individual Staking: Use a bamboo pole or a tomato cage for each plant.
- Mass Support: T-posts and twine are great for long rows of flowers.
- Netting: Hortonova netting is a pro trick that lets plants grow right through the mesh.
Bloom Management and Harvesting
Cutting for Vases
Cut your flowers when they are almost fully open. Dahlias won’t open much more once you put them in a vase. Use sharp clippers and cut them in the morning when they are hydrated. Cut the stems long, about the length of your arm, to help the plant grow more.
Post-Harvest Handling
- Strip Foliage: Remove any leaves that would sit under the water in your vase.
- Clean Water: Use fresh, warm water to help the stems drink up.
- Daily Care: Change the water every day to keep the blooms fresh for 3 to 5 days.
Garden Maintenance and Pest Control
Keep an eye out for pests like aphids or thrips that love to snack on petals. You can use organic treatments like Neem oil if things get out of hand. Deadheading is also super important. If you leave old, dead flowers on the plant, it will stop making new ones.
End of Season Care and Overwintering
Dealing with the First Frost
Your dahlias will look great until the first hard freeze hits. After that, the leaves will turn black and the plant will die back. This is totally normal and tells the tubers to go to sleep. Cut the stalks down to about 6 inches once they look fried.
Digging and Lifting Tubers

- The Curing Process: Let the tubers sit in the ground for about two weeks after the frost.
- Extraction: Use a digging fork to lift the clump gently so you don’t snap the necks.
- Cleaning: Shake off the dirt and wash them with a hose if you want them clean for storage.
Overwinter Storage Techniques
Store your tubers in a dark, cool spot that stays above freezing. You can pack them in boxes with vermiculite or wood shavings. Check on them every month to make sure they aren’t rotting or drying up. If one looks bad, throw it away so it doesn’t ruin the whole batch.
Propagation and Division
The Purpose of Division
Dahlia tubers are essentially underground storage units. Over a single growing season, one tuber will multiply into a clump containing five to twenty new tubers. If you leave this entire clump in the ground year after year, the plant will become overcrowded, resulting in weaker stems and fewer blooms. Dividing the clump ensures that each new plant has enough space and energy to thrive.
Timing the Division
While you can divide tubers in the autumn right after digging them up, most experts recommend waiting until spring. In the spring, the “eyes” or growth buds are much easier to see because they begin to swell and turn pink or green. This reduces the risk of accidentally cutting off a tuber that doesn’t have an eye, which would prevent it from growing.
Dividing Tubers in Spring

Tools for Successful Division
- Sharp Clippers or Knives: Use high-quality bypass pruners or a sharp garden knife to ensure clean cuts.
- Disinfectant: Keep a jar of rubbing alcohol or a 10% bleach solution nearby to dip your tools in between clumps. This prevents the spread of diseases like gall or virus.
- Labeling Markers: Have a permanent garden marker ready to write the variety name directly on the skin of each divided tuber so you don’t lose track of which is which.
The Division Strategy
- Locating the Crown: The crown is the area where the tuber meets the main stalk of the plant. This is the only place where eyes will form.
- Identifying the Eye: Look for a small bump or a tiny sprout near the neck of the tuber. If a tuber is broken off without a piece of the crown containing an eye, it will never grow a plant.
- Making the Cut: Carefully slice a piece of the crown away with the tuber attached. Ensure the neck—the thin part connecting the tuber to the crown—is not bent or broken, as this is the “lifeline” for the plant.
- Discarding “Mother” Tubers: The original tuber you planted last year is often large, dark, and slightly shriveled. It is usually best to discard this “mother” tuber and keep the fresh, firm new tubers for the best results.
Curing the Cuts
After you have finished dividing your clumps, do not plant the tubers immediately. Lay them out in a dry, shaded area for 24 to 48 hours. This allows the fresh cuts to “callus” or dry over, creating a protective skin that prevents bacteria and fungus from entering the tuber once it hits the damp soil.
Safety First
Always wear garden gloves during this process. Dahlia tubers can be slippery when wet, and the tools required for division are very sharp. Working slowly and methodically will ensure both your safety and the health of your future flower garden.
Growing dahlias is a deeply rewarding journey that transforms a simple, potato-like tuber into a breathtaking display of color and geometry. While it requires a bit of patience and attention to the seasons, the reward of harvesting armfuls of fresh blooms is unmatched. By following the steps in this guide—from careful planting to proper winter storage—you can ensure your garden remains a vibrant sanctuary for years to come. To help you stay organized throughout the year, follow this seasonal checklist.
Seasonal Checklist
Spring: The Season of Preparation
- Inventory Check: Inspect your stored tubers for any signs of rot or extreme shriveling.
- Waking Up Tubers: Move tubers to a warmer area to encourage eyes to sprout.
- Division: Carefully divide clumps, ensuring each tuber has a viable eye and a piece of the crown.
- Soil Prep: Amend your garden beds with compost and conduct a soil test if necessary.
- Planting: Place tubers in the ground only after the soil has warmed to at least 55-60°F and the danger of frost has passed.
- Support: Install your stakes or cages at the time of planting to avoid damaging the tubers later.
Summer: The Season of Growth
- Monitoring: Keep a close eye on new shoots; do not water until they emerge from the soil.
- Pinching: Snip the center growth when plants reach 12 to 18 inches to encourage bushier growth.
- Watering: Once established, maintain a consistent watering schedule of about one inch per week.
- Feeding: Apply a low-nitrogen liquid fertilizer or compost tea every two weeks during the peak growing months.
- Pest Control: Regularly check for aphids, mites, or thrips and treat them with organic methods as needed.
Autumn: The Season of Harvest
- Cutting: Harvest blooms frequently in the cool morning hours to keep the plant productive.
- Deadheading: Remove any spent or faded flowers immediately to prevent the plant from going to seed.
- Enjoying: Use your dahlias for bouquets, gifts, and home decor during their peak blooming window.
- End of Season: After the first hard frost turns the foliage black, cut the stalks down to six inches.
- Lifting: Gently dig up the tuber clumps after they have cured in the ground for about two weeks.
Winter: The Season of Rest
- Cleaning: Remove excess dirt from the tubers and allow them to dry slightly in a protected area.
- Storage: Pack tubers in crates with breathable material like peat moss or wood shavings.
- Environment: Keep your storage containers in a cool, dark, frost-free location (40-45°F).
- Maintenance: Set a reminder to check your tubers once a month during the winter to ensure they are staying healthy and dormant.
- Planning: Use the quiet winter months to browse catalogs and order new varieties for the coming spring.
Conclusion
Growing dahlias is a deeply rewarding journey that transforms a simple, potato-like tuber into a breathtaking display of color and geometry. While it requires a bit of patience and attention to the seasons, the reward of harvesting armfuls of fresh blooms is unmatched. By following the steps in this guide—from careful planting to proper winter storage—you can ensure your garden remains a vibrant sanctuary for years to come.
The process of caring for these flowers teaches us to move in harmony with the natural world, respecting the timing of the frost and the requirements of the soil. Whether you are growing a single plant in a backyard pot or managing a vast field for a flower farm, the joy of seeing the first sprout emerge and the first bud open is a universal thrill. As you master the techniques of pinching, staking, and dividing, you will find that your garden not only grows in size but also in beauty. Remember that every dahlia expert started with their very first tuber, and with the knowledge you now possess, you are well on your way to a spectacular growing season. Happy gardening!
Frequently Asked Questions
Can I grow dahlias in containers or pots?
Yes, dahlias grow very well in containers. Choose a large pot (at least 5 to 7 gallons) with excellent drainage holes. Use a high-quality potting mix rather than garden soil, and ensure the variety you choose isn’t too tall for the container, or provide extra sturdy staking.
Are dahlia flowers edible?
Actually, yes. Dahlia petals and tubers are technically edible. The flavor of the petals can range from spicy to tart, while the tubers are said to taste like a cross between a water chestnut and a potato. However, always ensure the flowers haven’t been treated with chemical pesticides before consuming.
How do I protect my dahlias from high winds?
Aside from staking, you can plant your dahlias near a fence or a windbreak. If a storm is predicted, you can add extra horizontal twine around your staking system to create a “cage” that keeps the heavy blooms from snapping off at the neck.
What should I do if my dahlia stems are hollow?
Hollow stems are common in many dahlia varieties. When you cut them for a vase, some gardeners prefer to turn the flower upside down and fill the hollow stem with water before placing it in the vase to help prevent air bubbles from blocking hydration.
Why are the bottom leaves of my dahlia plant turning yellow?
This is often a sign of either a nitrogen deficiency or overwatering. If the soil is very wet, stop watering immediately. If the soil is fine, try applying a liquid fertilizer with a bit more nitrogen to see if the green color returns to the base.
Can I grow dahlias from seed instead of tubers?
Yes, but they will not be “true to type.” Dahlias grown from seed are a genetic lottery and will look different from the parent plant. If you want a specific named variety like “Cafe au Lait,” you must grow it from a tuber or a cutting.
How do I get larger blooms on my dahlia plants?
The secret to giant “dinnerplate” blooms is a process called disbudding. Locate the cluster of three buds at the end of a branch and remove the two side buds, leaving only the central one. This forces the plant to send all its energy into making one massive flower.
Are dahlias toxic to dogs or cats?
Yes, dahlias are considered mildly toxic to pets. If ingested, they can cause digestive upset and skin irritation. It is best to plant them in areas where your pets don’t typically dig or snack on the greenery.
Why is my dahlia plant producing “blind” shoots with no flowers?
This is usually caused by a lack of sunlight or excessive heat. If the plant is stressed by high temperatures, it may stop producing buds to save energy. Ensuring the plant is well-mulched and hydrated during heatwaves can help.
How do I prevent powdery mildew on dahlia leaves?
Powdery mildew usually shows up late in the season when the air is humid. To prevent it, ensure there is plenty of space between plants for airflow and avoid getting the leaves wet when you water. You can also use a mixture of water and baking soda as an organic preventative spray.
What is the difference between a dahlia tuber and a bulb?
Dahlias grow from tubers, which are thickened underground stems, similar to a potato. Bulbs, like tulips or onions, have layers and contain the entire baby plant inside. Tubers require a piece of the “crown” or “neck” to grow, whereas a bulb is self-contained.
Can I use mulch around my dahlia plants?
Mulching is a great idea once the plants are at least a foot tall. A layer of straw, shredded bark, or compost helps keep the roots cool, retains moisture during the summer, and prevents weeds from stealing nutrients.
How long does a cut dahlia last in a vase?
Typically, a dahlia will last 3 to 5 days. To maximize vase life, change the water daily, keep the vase out of direct sunlight, and recut the stems at an angle every other day to keep the water-conducting veins open.
Why did my dahlia tubers rot in storage?
Storage rot is usually caused by too much moisture or poor airflow. If the tubers were put away while they were still wet from washing, or if the storage container was airtight, fungus and mold can take over. Always ensure they are dry to the touch before packing.
Can I take cuttings from my dahlia plants?
Yes, you can take “basal cuttings” in early spring. When the tuber sends up a shoot that is about 3 inches tall, you can snip it off with a tiny piece of the tuber attached and plant it in seed-starting mix. It will grow roots and become a new plant.
What causes dahlia petals to look chewed or distorted?
This is often the work of earwigs or thrips. These tiny pests love to hide inside the petals and snack on the flower as it opens. Using organic insecticidal soap or placing “earwig traps” (rolled-up damp newspaper) around the base of the plant can help.
Do dahlias attract pollinators?
Absolutely! Dahlias with open centers (like Single, Orchid, or Collarette types) are magnetic to bees, butterflies, and hoverflies. If you want to support local wildlife, make sure to include some of these open-centered varieties in your garden.
What does “hardened off” mean for dahlias?
If you started your tubers in pots indoors, “hardening off” is the process of slowly getting them used to the outside weather. Put the pots outside for a few hours a day in the shade, gradually increasing their time in the sun and wind over a week before planting them in the ground.
Should I fertilize my dahlias in the fall?
No, you should stop fertilizing about a month before the first frost. You want the plant to stop focusing on new growth and start sending its energy down into the tubers to prepare them for winter dormancy.
How can I tell the difference between a dahlia bud and a spent flower?
A new bud is usually round, firm, and points upward. A spent flower (one that has finished blooming) is usually more pointed or cone-shaped, feels soft/mushy, and often starts to point downward. Removing the pointed ones (deadheading) is key to more blooms.