Skip to content
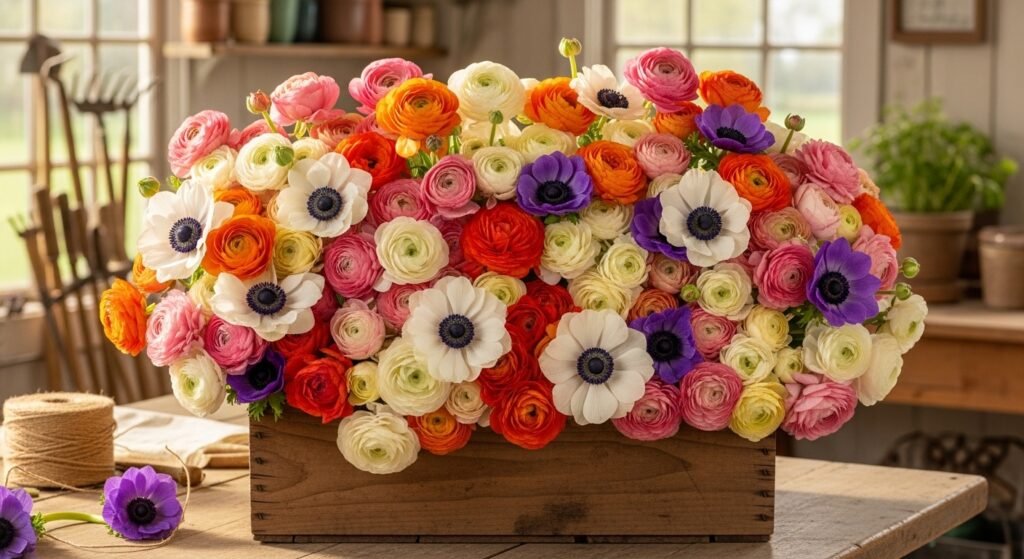
Learning how to grow ranunculus is like unlocking a secret garden full of color. These flowers look like paper thin layers of joy stacked on top of each other. Many folks feel scared to try growing them because they look so fancy. But you can totally master this process with some simple steps. This guide will walk you through every single detail you need to know. We will turn those weird looking dry roots into the best flowers you ever saw. You just need a little patience and some cool weather to make it happen. Get ready to transform your spring garden into a floral paradise today.
Introduction to Ranunculus and Anemones
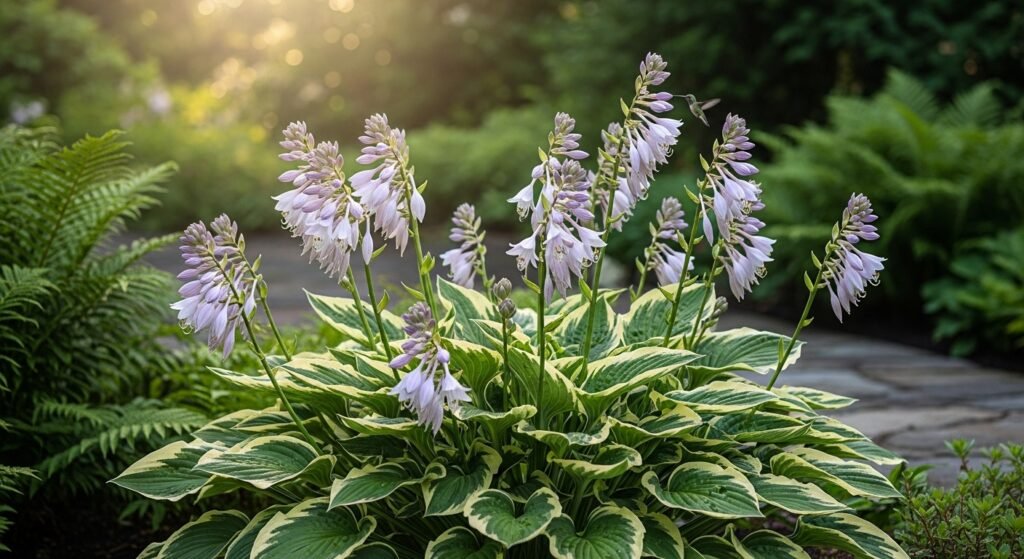
Ranunculus and anemones are the rockstars of the early spring garden season. Ranunculus flowers have hundreds of ruffled petals that look like fluffy colorful clouds. Anemones have dark centers and bright petals that look like they belong in a painting. Both of these plants grow from things called corms instead of round seeds. Understanding these corms is the first step in your big gardening journey. Ranunculus corms look like tiny brown octopuses with little dangling legs. Anemone corms look like small shriveled acorns that you might find under a tree. These flowers are called hardy annuals because they love the cold weather. They are the perfect way to start your garden before other flowers wake up.
Understanding Ideal Growing Conditions
You need to know how to grow ranunculus by mastering the temperature first. These plants do not like the hot summer sun at all. They want to live in a place that feels like a cool refrigerator.
Temperature Requirements
The right temperature is the biggest secret to having big healthy blooms. Your plants will be happiest when the night air is quite chilly.
- Nighttime Lows: Keep your plants between 45 and 50 degrees Fahrenheit at night.
- Daytime Highs: Try to keep the daytime air below 68 degrees Fahrenheit for best results.
- Cool Roots: The soil needs to stay cold so the roots can grow strong.
Cold Tolerance
Do not let the delicate petals of these flowers trick your brain. These plants are actually very tough when it comes to the winter cold.
- Freezing Temps: They can survive even when the air hits the mid-to-low twenties.
- Frost Protection: A little bit of frost won’t hurt them once they are settled.
- Winter Strength: They use the cold weather to build up their energy for spring.
Heat Sensitivity
The biggest enemy of your ranunculus and anemones is a hot sunny day. Once the weather gets too warm the plants will start to go away.
- Dormancy Trigger: If the air stays above 70 degrees for too long the plants quit.
- Yellow Leaves: You will see the leaves turn yellow when the heat gets too high.
- Saving Energy: The plant goes into a sleep mode to protect its corm for later.
Sourcing and Storing Your Corms
Getting the best corms is how to grow ranunculus with a huge success rate. You want to start with the best materials you can find in the market.

Buying Timeline
You should start looking for your corms during the fall months. This is when the best flower farms put their stock up for sale.
- Fall Selection: Buy your corms in autumn to get the coolest colors available.
- Early Shipping: Most shops will send them to you right after you buy them.
- Planning Ahead: Buying early means you are ready as soon as spring arrives.
Evaluating Corm Quality
Not all corms are created equal when you open your delivery box. You want to make sure you have the healthiest starts for your garden.
- Firm Texture: Healthy corms should feel hard and dry like a piece of wood.
- No Mold: Look closely to make sure there is no fuzzy white or green mold.
- Size Matters: Usually bigger corms will give you more flowers per plant.
Storage Before Planting
If you live in a cold place you have to wait to plant your corms. Michigan gardeners often have to store theirs until the late winter months.
- Cool and Dry: Find a spot in your house that stays cool and very dry.
- Dark Spots: Keep them out of the direct sunlight so they stay dormant.
- Original Bags: Keep them in the paper bags they came in for good airflow.
Maintaining Dormancy
The goal of storage is to keep the corm completely asleep and dry. If they get wet too early they might start to rot in the bag.
- Low Humidity: High moisture in the air can wake them up too soon.
- Air Flow: Make sure the bags are not squashed so air can move around.
- Check Weekly: Look at your corms once a week to make sure they stay dry.
Determining Your Planting Timeline
Timing is everything when you are learning how to grow ranunculus in your yard. You have to work with the weather and the calendar together.
Regional Differences
Your garden zone will tell you exactly when you should start your work. A gardener in the south will start much earlier than a northern gardener.
- Northern Zones: In Zone 5 you will wait until the very end of winter.
- Southern Zones: Warm areas might plant their corms in the late fall.
- Local Weather: Always watch your local forecast for any weird heat waves.
The Last Frost Rule
The general rule is to get your plants outside before the last frost. This gives them time to bloom before the summer heat kills them.
- Counting Backwards: Look at your last frost date and count back 4 to 6 weeks.
- Early Start: Getting them in the ground early leads to longer stems.
- Soil Prep: Make sure your garden soil is not frozen when you go to plant.
Indoor vs. Outdoor Starts
Many people choose to start their plants inside where it is safe. This process is called pre-sprouting and it gives you a big head start.
- Indoor Timing: Start your indoor trays about 8 to 10 weeks before the last frost.
- Direct Sowing: Some people plant dry corms right in the dirt later in spring.
- Pre-Sprout Benefits: Pre-sprouting leads to flowers that bloom much earlier in the year.
Fall Planting vs. Spring Planting
Deciding between fall and spring planting depends on your local winter temps. Both ways can work if you follow the right specific steps.
- Warm Winters: If your ground never freezes hard you can plant in the fall.
- Cold Winters: Stick to spring planting if your ground turns into an ice cube.
- Protection Needs: Fall planted corms might need a heavy layer of mulch.
Step-by-Step Pre-Planting Preparation
Now we get to the fun part of how to grow ranunculus properly. This is where we bring the dead looking corms back to life.
Soaking Your Corms

Soaking is like giving your corms a big glass of water after a long nap. It tells the plant that it is time to start growing roots.
- The Bucket: Use a clean bucket and fill it with room temperature water.
- Soak Time: Let the corms sit in the water for 4 to 6 hours total.
- Visible Growth: You will see the corms get fat and plump up very quickly.
Oxygenating the Water
If you want to be a pro you can add air to your soaking water. This keeps the water fresh so the corms do not get sick.
- Bubbler Method: Use a small aquarium bubbler to keep the water moving.
- Drip Method: Leave the faucet on a tiny drip to cycle the water.
- Fresh Air: Moving water has more oxygen which helps the plant stay healthy .
The Pre-Sprouting Process

Pre-sprouting is how to grow ranunculus with a very high success rate. It allows you to baby the plants while it is still snowing outside.
- Seed Trays: Use flat trays or 50-cell trays filled with moist potting soil.
- Correct Orientation: Always put the pointy legs of the corm facing down.
- Covering Up: Cover the corms completely with about an inch of soil.
The Rooting Phase
The corms need to sit in a cool spot to grow their root systems. This is not the time for bright lights or warm rooms.
- Cool Room: Find a basement or garage that stays between 40 and 50 degrees.
- Darkness: They do not need light until the green leaves start to show up.
- Checking Growth: Look for white roots starting to grow out of the corm.
Indoor Care for Emerging Sprouts
Once you see green leaves you have to change how you care for them. Now the plants are hungry for light and fresh air.
Lighting Requirements
As soon as the green tufts appear you need to give them lots of light. Without light the plants will get tall, skinny and very weak.
- LED Lights: Use cheap LED shop lights hanging right over the trays.
- Timer Set: Keep the lights on for about 14 to 16 hours every day.
- Proximity: Keep the bulbs just a few inches above the green leaves.
Moisture Management
Keeping the soil just right is the hardest part of the indoor phase. You want the dirt to feel like a damp sponge that you wrung out.
- Avoid Sogginess: If the soil is too wet the corms will rot and die.
- Bottom Watering: Pour water into the bottom tray so the roots drink it up.
- Surface Dry: Let the top of the soil dry out a little bit between waterings.
Air Circulation
Fresh air helps the plants grow strong stems that won’t fall over. It also stops bad mold from growing on the soil surface.
- Small Fans: Put a small fan in the room to keep the air moving.
- Low Speed: You just want a gentle breeze not a big wind storm.
- Strong Stems: The moving air makes the plant build a tougher cell structure.
Growth Targets
You want your plants to reach a certain size before they go outside. This makes sure they are tough enough to handle the real world.
- Height Goal: Wait until the plants are 2 to 3 inches tall.
- Leaf Count: They should have a few sets of healthy green leaves.
- Root Bound: Check to see that roots are filling up the tray cells.
Strategic Outdoor Planting Techniques
Moving your babies outside is a big step in how to grow ranunculus successfully. You have to pick the right spot and prepare the ground well.
Soil Preparation and Selection
The dirt in your garden needs to be healthy and full of good stuff. Ranunculus are very picky about where they put their tiny roots down.
- Loose Soil: The dirt should be easy to dig with your bare hands.
- Drainage: Water should never sit in a puddle on top of your garden bed.
- Organic Matter: Mix in some good compost to give the plants food.
Addressing Clay Soils
If your garden has thick heavy clay you have to be extra careful. Clay holds too much water and can drown your precious flower corms.
- Soil Amending: Mix in sand or peat moss to help break up the clay.
- Mounded Beds: Plant in mounds so the water runs away from the stems.
- Patience: Never work your clay soil when it is soaking wet and sticky.
The Bulb Crate Method

Using plastic crates is a genius way to grow these flowers in any yard. It solves the problem of bad soil or limited garden space.
- Crate Selection: Use old bulb crates or milk crates with holes in them.
- Potting Mix: Fill the crates with high quality well-draining potting soil.
- Portability: You can move the crates if the weather gets too hot or cold.
Amending the Soil
Adding extra nutrients will help your flowers grow bigger and brighter. You can use natural things to make the dirt much better for them.
- Aged Manure: Mix in old manure that has sat out for a long time.
- Compost Tea: Water your plants with liquid compost once they are growing.
- Bone Meal: A little bit of bone meal helps the roots grow strong.
Proper Spacing and Arrangement
Spacing is very important so each plant has room to breathe and grow. If they are too crowded they might get sick with leaf diseases.
Anemone Spacing
Anemones are okay with being close to their neighbors in the garden. You can pack them in quite tightly to get a big show of color.
- Distance: Plant your anemone starts about 4 to 6 inches apart.
- Crate Count: You can fit about 18 to 20 anemones in one large crate.
- Staggered Rows: Plant them in a zigzag pattern to fill the space better.
Ranunculus Spacing
Ranunculus plants are much bigger and need more elbow room to thrive. They spread out their leaves and produce many more flower stems.
- Distance: Give each ranunculus plant at least 9 inches of space.
- Crate Count: Only put about 10 ranunculus plants in a single bulb crate.
- Air Flow: Good spacing lets the wind move through the leaves to keep them dry.
Protection from Environmental Stress
Even though they are tough you should still help them through bad weather. A little protection goes a long way in how to grow ranunculus.
Frost Cloth and Low Tunnels
Using a white fabric cover can keep your plants much warmer at night. It acts like a cozy blanket for your garden during a cold snap.
- Agribon Fabric: Use lightweight frost cloth that lets light and water through.
- Hoop Houses: Use wire hoops to keep the cloth off the delicate leaves.
- Heat Trapping: The cloth can raise the temperature by about 5 to 10 degrees.
Wind Protection
Early spring winds can be very strong and might snap your flower stems. You need to make sure your plants have a shield from the gusts.
- Windbreaks: Plant near a fence or a wall to block the hardest winds.
- Staking: You can use small sticks to support the taller flower stems.
- Grouping: Planting things together helps them hold each other up.
Mulching Techniques
Mulch helps keep the soil at a steady temperature all day and night. It also keeps the moisture in the ground so you don’t have to water as much.
- Straw Mulch: Use clean straw to cover the dirt around your plants.
- Shredded Leaves: Old leaves from the fall make a great free mulch.
- Thin Layers: Do not put the mulch too close to the main green stem.
Long-Term Maintenance and Bloom Care
Once the plants are growing well you just have to keep them happy. This stage is all about watering and feeding your hungry flowers.
Watering Schedules
You have to watch the soil moisture every single day in the spring. If the soil dries out completely the plants will think it is summer and quit.
- Morning Watering: Water early in the day so the leaves dry before night.
- Deep Soaks: It is better to water deeply once than a little bit every day.
- Crate Care: Plants in crates dry out faster and need more frequent water .
Nutrient Support
Flowers need a lot of energy to make those hundreds of beautiful petals. Giving them some extra food will lead to much better results.
- Balanced Food: Use a fertilizer that has equal parts of all nutrients.
- Slow Release: Put granules in the soil that feed the plant over many weeks.
- Organic Options: Fish emulsion is a great smelly but healthy snack for plants.
Fertilization Needs
Timing your fertilizer is just as important as picking the right brand. You want to feed the plant when it is working the hardest.
- First Feed: Give them food when you first put them in the ground.
- Bud Phase: Add more fertilizer when you see the tiny flower buds forming.
- Stop Time: Stop feeding once the flowers start to open up fully.
Managing the Bloom Window
You can expect to have flowers for about six weeks if you do a good job. This is the most rewarding part of the whole growing process.
- Deadheading: Cut off old dying flowers so the plant makes new ones.
- Stem Length: Longer stems are better for putting in vases in your house.
- Enjoyment: Make sure you take time to walk through the garden and look at them.
Harvesting for Cut Flowers
Knowing how to grow ranunculus also means knowing when to pick them. Harvesting at the right time makes them last much longer in your house.
The Marshmallow Stage

For ranunculus you want to pick the flower before it is wide open. This is a special trick that professional flower farmers always use.
- Squeeze Test: Gently squeeze the flower bud with your fingers.
- The Feel: It should feel soft and squishy like a marshmallow.
- Vase Opening: The flower will finish opening up once it is in your vase.
The Closed Center Stage
Anemones have a slightly different rule for when they are ready to pick. You want to look at the center of the flower to know for sure.
- Petal Lift: Pick them when the petals have just unfolded from the center.
- Dark Centers: The dark middle should still look tight and not fuzzy.
- Morning Harvest: Always cut your flowers in the cool air of the morning.
Post-Harvest Care
Once you cut the flowers you have to keep them cool and hydrated. Treat them like a prize so they stay beautiful for a week or more.
- Clean Vases: Always use a very clean vase with fresh cold water.
- Flower Food: Add a little sugar or floral food to the water.
- Cool Spot: Keep the vase out of the direct sun inside your house.
Overwintering and Saving Corms
If you love your flowers you might want to save the corms for next year. This can save you money and let you grow the same colors again.
Zone-Specific Advice
Whether you can leave them in the ground depends on where you live. It is a gamble but sometimes it pays off with massive plants.
- Zone 7 and Above: You can usually leave them in the dirt with some mulch.
- Zone 6 and Below: You should probably dig them up so they don’t freeze.
- Success Rates: Not every corm will survive the winter so be ready for that.
Risk Factors for Saving
There are many things that can go wrong when you try to save corms. You have to be okay with losing a few to bugs or bad weather.
- Winter Rot: If the ground is too wet the corms will turn into mush.
- Pests: Hungry mice or voles might eat your corms during the winter.
- Extreme Cold: A random deep freeze can kill even the toughest corms.
Lifting and Storing
Digging up the corms is a process that happens in the early summer. You do this once the leaves have turned completely brown and dry.
- Careful Digging: Use a pitchfork to gently lift the corms out of the dirt.
- Cleaning: Shake off all the extra soil so you can see the corm clearly.
- Drying: Let them sit in a shady dry spot for a few days to cure.
Cleaning and Drying

Properly drying the corms is the only way to keep them from molding in storage. This turns them back into the hard little octopuses you started with.
- Remove Greens: Cut off the dead brown stems before you store them.
- Screen Drying: Lay them on a screen so air can reach the top and bottom.
- Paper Bags: Put the dry corms in paper bags for the rest of the summer.
Troubleshooting Common Growing Issues
Sometimes things go wrong even when you follow all the rules carefully. Do not panic because most garden problems have a simple fix.
Dealing with Leggy Plants
If your plants look long and floppy they are probably not getting enough light. This is very common with indoor starts in late winter.
- Lower the Lights: Move your bulbs closer to the tops of the plants.
- Cooler Air: Move the plants to a colder room to slow down the growth.
- Deep Planting: You can plant them a little deeper in the garden to support the stem.
Genetic Variations
Sometimes your flowers might look different than the picture on the bag. This usually has to do with the genetics of the specific plant.
- Single Blooms: Some ranunculus will only have one layer of petals.
- Color Shifts: The color might be lighter or darker depending on the soil.
- Mixes: If you buy a mix you will get a surprise variety of shapes.
Delayed Planting Problems
If you forget to plant your corms you might miss your chance for the year. You have to decide if it is worth the risk of planting late.
- Heat Risk: Late planting means the heat might kill the flowers before they bloom.
- Small Plants: The plants won’t have enough time to grow big and strong.
- Save for Next Year: It might be better to keep the corms dry until next spring.
High Temperature Stress
A random heat wave in May can be a disaster for your spring garden. You have to act fast to protect your cool-loving plants from the sun.
- Shade Cloth: Use a dark cloth to block the hot afternoon sun.
- Extra Water: Give them more water to keep the root zone cool.
- Mulch Check: Make sure your mulch layer is thick enough to block the heat.
Pest Management
Bugs love the tender green leaves of ranunculus and anemones in the spring. You need to keep a close eye on your plants every single day.
- Aphids: Look for tiny green bugs on the new flower buds.
- Slugs: Use organic slug bait if you see holes in the leaves.
- Spider Mites: These show up when the weather starts to get dry and warm.
Advanced Tips for Flower Farmers
If you want to grow a lot of flowers you can use some pro techniques. These steps help you get the most flowers possible from your space.
Using High Tunnels
A high tunnel is like a giant plastic house for your flowers to live in. It keeps the wind out and traps a little bit of heat from the sun.
- Extended Season: You can plant much earlier in the winter inside a tunnel.
- Better Quality: The flowers stay clean because the rain doesn’t hit them.
- Longer Stems: The protected air helps the stems grow taller for bouquets.
Succession Planting
Succession planting means you plant small batches of corms every two weeks. This gives you a continuous supply of flowers for a long time.
- Spread the Joy: You won’t have all your flowers bloom at the exact same time.
- Risk Management: If one batch gets sick the others might still be fine.
- Timing: Start your first batch in February and your last in April.
Pro Growing Comparisons Table
| Feature | Ranunculus | Anemone |
| Corm Shape | Octopus legs | Shriveled acorn |
| Spacing | 9 inches | 4-6 inches |
| Bloom Shape | Ruffled petals | Dark centers |
| Cold Limit | Mid 20s | Mid 20s |
| Harvest Stage | Marshmallow feel | Petals just open |
Conclusion: The Reward of Spring Blooms
Learning how to grow ranunculus is a journey that ends with amazing beauty. Even though it takes some work, the flowers are worth every single minute. You can start small with just a few corms in a pot on your porch. Soon you will be the expert gardener that all your neighbors talk about. Just remember to keep them cool and give them a good soak to start. Your spring garden is waiting for you to bring it to life today. Take the first step and go buy some corms before the season passes you by.
Frequently Asked Questions
Can I grow ranunculus in pots?
Yes you can grow them in pots as long as the pots have drainage holes. Use a large pot so the roots have plenty of room to grow deep.
How often should I water my corms?
Water them whenever the top inch of soil feels dry to your touch. Do not let them sit in a pool of water or they will rot.
Why are my leaves turning yellow?
Yellow leaves usually mean the weather is getting too hot for the plant. It could also mean the soil is too wet and the roots are unhappy.
Do I need to fertilize every week?
No, you only need to fertilize once or twice during the growing season. Too much food can actually hurt the delicate roots of the plant.
Will they come back every year?
In cold places they usually do not come back unless you dig them up. In warm places they might return if the soil stays dry in summer.
Can I grow ranunculus and anemones in a greenhouse all winter?
Yes, you can definitely grow them in a greenhouse if you keep it cool. Greenhouses are great because they protect the plants from heavy rain and wind. Just make sure the temperature inside does not get too hot during the day. If it gets above 70 degrees, you must open the vents to let cool air in.
What should I do if my corms get moldy during the soaking phase?
If you see a little bit of mold, you can try to rinse it off with fresh water. You can also add a tiny splash of hydrogen peroxide to the soaking water to kill germs. However, if the corm feels mushy like a rotten grape, you should throw it away immediately. Mushy corms will not grow and can spread sickness to the healthy ones.
Do ranunculus and anemones need a lot of fertilizer?
These flowers are actually light feeders compared to big plants like tomatoes. They mostly need good soil that already has compost mixed into it. If you want to help them, give them a balanced liquid food once every two weeks. Stop feeding them once the first flower starts to show its color.
Can I grow these flowers in a window box?
Window boxes are a fun place to grow these spring beauties as long as they are deep. Make sure the box is at least eight inches deep so the roots have space. Remember that window boxes dry out very fast in the sun and wind. You will need to check the soil moisture every single morning to keep them happy.
What happens if I plant the corms with the legs pointing up?
If you plant them upside down, the plant will still try its best to grow. The sprout will have to turn around underground to find the surface of the dirt. This wastes a lot of the plant’s energy and makes it reach the surface much later. It is always best to double-check that the “octopus legs” are pointing toward the bottom.
Why did my corms disappear from the garden bed?
If your corms are gone, you likely have some hungry garden visitors like squirrels or voles. These small animals think the starchy corms are a delicious winter snack. You can protect your planting spot by putting a piece of hardware cloth over the soil. This keeps the critters from digging them up while the plants are sleeping.
How do I know if I should water during the winter?
If your ground is frozen solid, you do not need to water at all. If you have a dry winter with no snow or rain, check the soil under the surface. If the dirt feels very dusty and dry, give it a light drink on a day when it is not freezing. Most of the time, the natural winter moisture is enough for the dormant corms.
Do these flowers attract bees and butterflies?
Yes, bees and butterflies love the bright colors of ranunculus and anemones in early spring. Since these are some of the first flowers to bloom, they provide important food for pollinators. Anemones are especially popular because their dark centers are easy for bees to spot. Growing them is a great way to help the environment in your neighborhood.
Can I grow ranunculus and anemones from actual seeds?
You can grow them from seeds, but it is a much longer and harder process. Seeds take a long time to turn into plants and might not bloom in the first year. Most home gardeners use corms because they are much faster and easier to handle. Corms are basically a “storage battery” that already has the energy to make flowers.
Why are my flower stems so short?
Short stems usually happen when the weather gets warm too quickly in the spring. The plant feels the heat and rushes to make a flower before it grows a long stem. To get longer stems, try to plant your corms as early as possible in the cool season. You can also use a little bit of shade cloth to keep the ground cool.
Is it okay to use tap water for my plants?
Tap water is usually fine for these flowers in most parts of the country. If your water has a lot of chlorine, you can let it sit in a bucket overnight before using it. This lets the chemicals evaporate so the water is more natural for the roots. Room temperature water is always better than ice-cold water from a hose.
How do I store corms if I live in a very humid place?
If your house is very humid, you might want to store your dry corms in a box of vermiculite. This material helps soak up extra moisture from the air so the corms stay dry. Make sure the box has some holes in it so the air can still move around. Check them often to make sure they are not getting soft or fuzzy.
Can I use wood chips as mulch for these flowers?
Wood chips are not the best choice for these small spring plants. They are often too heavy and can trap too much moisture against the green stems. It is much better to use light straw or shredded leaves that the sprouts can push through easily. Wood chips are better for big trees and shrubs instead of delicate flowers.
Do ranunculus and anemones have a scent?
Most modern varieties of these flowers do not have a very strong smell. They are grown for their amazing colors and shapes rather than their perfume. However, some people notice a very light and earthy scent when they have a big bunch of them. They are perfect for people who like flowers but are sensitive to strong smells.
Can I grow them in the shade?
These flowers really prefer to have full sun while they are growing in the spring. They need at least six hours of bright sunlight to make strong stems and big blooms. If they are in too much shade, they will become leggy and might not flower at all. Only give them shade if the afternoon sun is getting too hot.
What should I do with the plants after the flowers die?
Once the flowers are done, you should leave the green leaves alone for a while. The leaves are busy catching sunlight to turn it into energy for next year. Wait until the leaves turn yellow and die back naturally before you cut them off. This makes sure the corm is fully charged for the next growing season.
Are ranunculus and anemones poisonous to pets?
Yes, these plants can be toxic to cats, dogs, and horses if they decide to eat them. They contain a chemical that can cause a stomach ache or skin irritation for your pets. It is always a good idea to plant them in a spot where your pets cannot reach them. If you suspect your pet ate some, call your vet right away.
Why did my anemones bloom but not my ranunculus?
Anemones are often a little bit tougher and faster to bloom than ranunculus. They can handle slightly more stress and colder temperatures without complaining. If your ranunculus didn’t bloom, they might have gotten too warm or didn’t have enough time to grow. Each plant has its own personality and timing in the garden.
Can I mix different colors of corms in the same pot?
Mixing colors is a fantastic way to create a beautiful “bouquet in a pot” for your porch. You can combine bright reds, soft pinks, and pure whites for a stunning look. Just make sure you give each corm enough space so they are not fighting for food. A mixed pot is a great way to show off all the different varieties.
How long do the corms stay good in the bag?
Dry corms can usually stay good for about a year if they are kept in a cool and dark spot. However, they lose a little bit of their energy the longer they sit around. It is always best to plant them during the first season after you buy them. If they look very shriveled and break when you touch them, they might be too old.