Skip to content
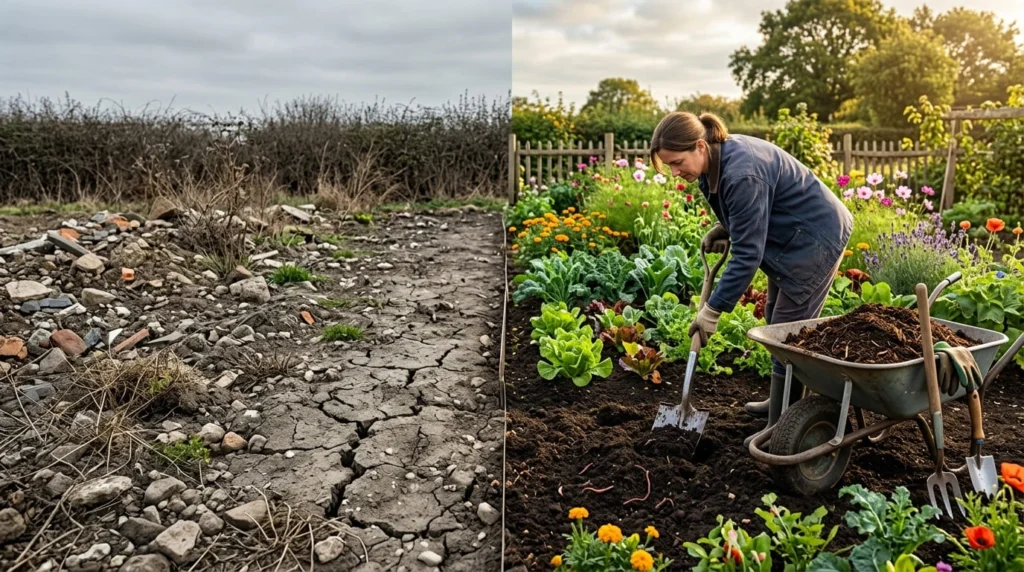
Growing plants in poor soil can feel impossible. Nothing grows well. Water does not drain properly. Even weeds struggle to survive.
This often happens after construction work. It can also happen on old driveways, worn-out farmland, or places with heavy foot traffic.
The good news is that damaged soil is not beyond repair. With the right steps, you can turn it into healthy, garden-ready soil. The process takes time, but the results are worth it.
In this guide, you will learn how to rebuild damaged soil from the ground up.
What Does Dead Soil Mean?

Dead soil is not truly dead. It simply lacks the things plants need to grow.
Most damaged soil has one or more of these problems.
1. Compacted Soil
Compacted soil is hard and dense.
Heavy machines, vehicles, and constant walking press soil particles together. This leaves little space for air and water.
As a result:
- Plant roots cannot spread.
- Water drains poorly.
- Helpful soil organisms struggle to survive.
2. Very Little Organic Matter
Healthy soil contains organic matter.
This comes from broken-down leaves, plants, and other natural materials. Organic matter feeds the soil and helps plants grow.
Construction work often removes the topsoil. Years of farming without adding compost can also strip organic matter away.
Without it, the soil becomes dry and weak.
3. Few Living Organisms
Healthy soil is full of life.
It contains:
- Earthworms
- Helpful bacteria
- Fungi
- Tiny insects
These organisms break down organic matter into nutrients.
Damaged soil often has very little biological activity. Because of this, plants cannot get the nutrients they need.
4. Poor pH or Nutrient Balance
Some soil has the wrong pH level.
Construction debris can make soil too alkaline. Old farmland may lose important nutrients after many years of growing the same crops.
Both problems make it harder for plants to grow well.
Why One Quick Fix Does Not Work
Most damaged ground has several problems at the same time.
For example, the soil may be compacted, low in organic matter, and missing healthy microbes.
Because of this, adding compost alone is rarely enough.
Instead, you need to improve the soil step by step. Each step helps build healthy, garden-ready soil that lasts for years.
Step 1: Test Your Soil Before You Fix It
Many people skip this step. However, testing your soil first can save time and money.
A simple soil test shows:
- Soil pH level
- Nutrient levels
- Organic matter content
These results help you choose the right soil amendments.
If your garden was near an old building, fuel tank, or treated wood, test for contamination too. Harmful materials can stop plants from growing.
Do not guess what your soil needs. Adding the wrong product can make the problem worse.
For example, adding lime to already alkaline soil will not help. Instead, it can create new problems for your plants.
A soil test gives you a clear starting point. It helps you make the right decisions from the beginning.
Step 2: Break Up Compacted Soil

After testing, the next step is to loosen the soil.
Compacted soil blocks air, water, and roots. Until you fix this problem, other improvements will have little effect.
Choose the right tool for your garden size.
For small areas, you can use:
- A broadfork
- A garden fork
- The double-digging method
For larger areas, a mechanical tiller can save time and effort.
Work at the Right Time
Never work wet soil.
Wet clay sticks together and becomes even harder when it dries. Very dry soil is also difficult to loosen.
Instead, work when the soil feels slightly moist. It should crumble easily in your hand.
Why This Step Matters
Loosening the soil creates space for:
- Air to reach plant roots
- Water to soak into the ground
- Earthworms and microbes to move freely
- Roots to grow deeper and stronger
Healthy soil starts with good structure. Once the soil is loose, it is ready for compost and other organic materials.
Step 3: Feed the Soil, Not Just the Plants

Healthy soil is full of life. It contains bacteria, fungi, earthworms, and other tiny organisms.
These living organisms break down organic matter. They also release nutrients that plants can absorb.
Many gardeners only feed their plants. However, healthy gardens begin by feeding the soil.
The best materials include:
- Finished compost
- Aged manure
- Leaf mold
These materials do more than add nutrients. They also improve soil structure and help the soil hold water.
As the soil becomes healthier, it needs less work each year.
How Much Compost Should You Add?
For badly damaged soil, mix 2 to 3 inches of compost into the top 8 to 10 inches of loose soil.
This will not fix everything overnight. However, it starts the natural process of rebuilding healthy soil.
With time, microbes and earthworms will continue improving the ground.
Step 4: Bring in Topsoil When Needed

Sometimes, compost is not enough.
In some areas, there is very little real topsoil left. This often happens after construction projects.
Builders may remove the top layer of soil. What remains is usually clay, subsoil, or rocky fill dirt.
Signs You Need New Topsoil
Check your soil for these warning signs:
- Hard clay appears just a few inches below the surface.
- You find rocks or construction debris while digging.
- Water stays on the surface after rain.
- The soil is gray, orange, or very pale.
- The soil lacks a dark, crumbly texture.
If you notice several of these signs, your garden may need fresh topsoil.
Why Topsoil Makes a Difference
Compost improves existing soil. However, it cannot replace soil that no longer exists.
In this situation, bringing in quality topsoil from a reputable landscape supply yard is often the fastest solution.
Fresh topsoil creates a healthy base for plants. It also improves drainage, root growth, and water retention.
After adding topsoil, mix in compost to increase organic matter. This combination creates strong, fertile, and garden-ready soil.
Although it costs more at first, it often saves months of work. Your plants will also have a much better chance of success.
Step 5: Let Nature Help Rebuild Your Soil
If you are not planting right away, let nature do some of the work.
A method called sheet mulching, or lasagna gardening, slowly rebuilds poor soil. It also reduces the need for digging.
How to Sheet Mulch

Follow these simple steps:
- Cover the ground with cardboard or several layers of newspaper.
- Wet the paper so it stays in place.
- Add a layer of compost.
- Cover it with straw, shredded leaves, or wood mulch.
- Repeat the layers if needed.
Over time, the materials break down naturally.
Earthworms and helpful microbes mix everything together. As a result, the soil becomes rich, loose, and full of nutrients.
Although this method takes time, it creates healthy soil with very little effort.
Common Mistakes That Slow Soil Recovery
Avoid these common mistakes when rebuilding damaged soil.
1. Tilling Wet Clay
Wet clay sticks together easily.
When it dries, it becomes hard and lumpy. This can make compaction even worse.
Instead, wait until the soil is slightly moist before working it.
2. Using Fresh Manure
Fresh manure is too strong for young plants.
It can burn roots and upset the soil’s nutrient balance.
Always use well-aged or fully composted manure.
3. Skipping the Soil Test
Many gardeners guess what their soil needs.
This often leads to wasted time and money.
For example, adding lime to alkaline soil can make the problem worse.
A simple soil test helps you choose the right solution.
4. Planting Too Soon
Freshly improved soil needs time to settle.
Compost also needs time to break down and feed the soil.
Waiting a few weeks gives your plants a much better start.

Final Thoughts
Building garden-ready soil takes patience. However, every step brings you closer to healthy, productive ground.
Start by testing your soil. Then loosen compacted areas and add plenty of organic matter.
If there is little or no topsoil left, bringing in quality topsoil from a reputable landscape supply yard can give your garden a strong foundation.
Finally, give nature time to do its job.
Most damaged soil shows clear improvement within one growing season. By the second season, many gardens produce healthier plants, stronger roots, and better harvests.
Follow these steps, and you can turn even poor ground into rich, fertile, garden-ready soil.
Frequently Asked Questions
The time depends on how badly the soil is damaged. Most gardens show noticeable improvement within one growing season. Very poor soil may take one to three years to fully recover with regular compost, mulch, and proper care.
Yes, but you should improve the soil first. Growing vegetables in poor soil often leads to weak plants and low harvests. Testing the soil and adding organic matter creates a healthier growing environment.
The fastest method is to loosen compacted soil, add plenty of finished compost, and apply quality topsoil if the original topsoil is missing. Regular mulching and proper watering also help speed up soil recovery.
Yes. Earthworms naturally improve soil structure by creating small tunnels that allow air and water to move through the ground. They also break down organic matter into nutrients that plants can use.
Small rocks usually do not cause problems. However, large rocks, construction debris, and broken concrete should be removed because they block root growth and reduce drainage.
Yes. Organic mulch slowly breaks down and adds valuable organic matter to the soil. It also helps keep the soil moist, reduces weeds, and protects beneficial soil organisms.