Skip to content
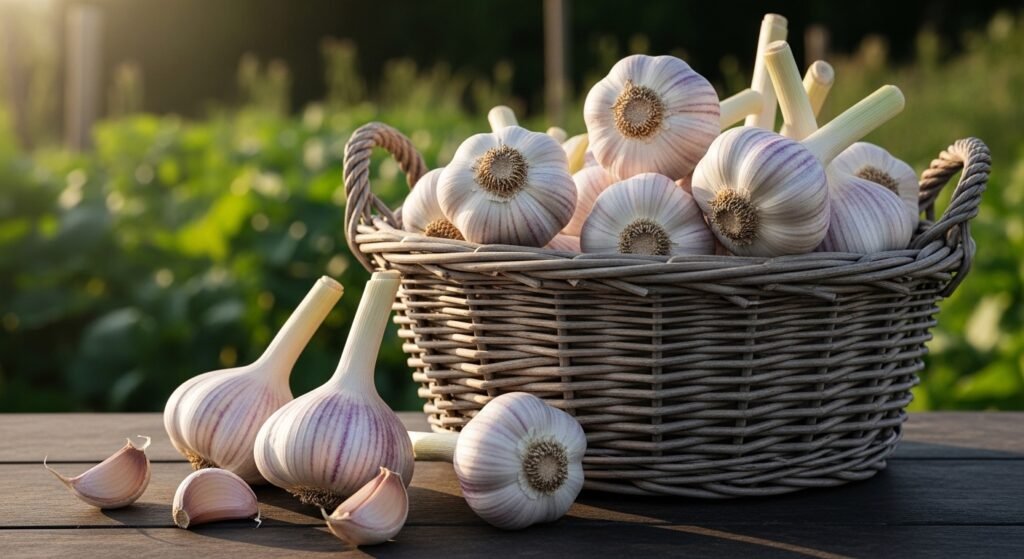
Garlic is one of the most chill crops you can grow in your backyard. It does most of its work while you are sleeping through the winter. This guide will show you exactly how garlic grows from a clove into a massive head. We want those huge honkin’ heads that make your neighbors jealous. You do not need to be a pro to get this right. Just follow these steps and you will be a garlic legend. We are going to dive deep into every single detail of the process. From picking your seeds to curing the bulbs, we have you covered. Let’s get your hands dirty and start this gardening journey together.
Introduction to Growing Garlic
The life of a garlic plant is a wild ride through all four seasons. It starts as a single clove tucked into the warm soil in the fall. During the winter, it builds a strong root system under the frost. When spring hits, it shoots up green leaves and starts building a bulb. By summer, you have a full head of garlic ready for the kitchen. Understanding this cycle is the secret to a great harvest.
Growing your own food is a total game changer for any home cook. Store-bought garlic is often old and lacks that spicy kick. Homegrown garlic is juicy, flavorful, and smells absolutely amazing. Plus, it is a low-maintenance crop that fits into any busy schedule. You plant it once and let nature do the heavy lifting for months. It is the perfect project for both beginners and seasoned green thumbs.
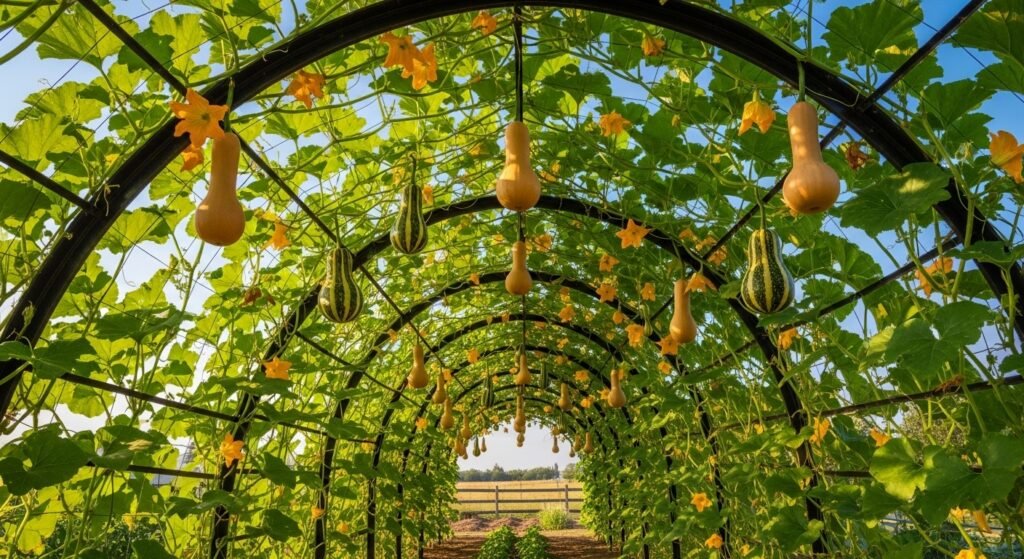
The goal here is simple: we want the biggest garlic heads possible. I call these “Honkin’ Heads” because they are impressively large and heavy. Achieving this requires a mix of good timing and high-quality soil. We also need to focus on picking the right cloves to start with. Every choice you make early on affects the final weight of your harvest.
Choosing the Right Garlic Variety for Your Climate
Before you dig a single hole, you need to pick your team. There are two main families of garlic you need to know about. These are soft-necks and hard-necks. Your local weather is the biggest factor in this decision. Picking the wrong one can lead to tiny bulbs or no harvest at all. Let’s break down which one belongs in your garden bed.

Softneck Garlic (Allium sativum var. sativum)
Softneck garlic is the kind you usually see at the grocery store. It has flexible stems that are great for braiding into beautiful kitchen decor. These varieties usually have a lot of cloves in each head. They are known for having a very long shelf life after harvest. You can store these for many months without them going bad.
These plants love a warm climate where the winters are not too harsh. If you live in a place like California or the South, this is for you. Specifically, gardeners in USDA Zone 10 and above should stick to softnecks. They do not need a long deep freeze to grow big bulbs. They are tough and handle heat much better than their hardneck cousins.
There are a few popular varieties you should look for online. California Early is a classic that grows fast and stays reliable. Silver Rose is another great pick that looks beautiful with its pinkish skin. Silver White is perfect if you want a mild flavor and great storage. These are all solid choices for a warm-weather garden.
Hardneck Garlic (Allium sativum var. ophioscorodon)
Hardneck garlic is the favorite of many gourmet chefs and cold-weather growers. It produces a stiff central stalk called a scape in the spring. These varieties usually have fewer cloves, but the cloves are much larger. The flavor is often described as more complex and spicy. The only downside is they do not store as long as softnecks.
These plants need a cold winter to reset their internal clock. This process is called vernalization, and it is totally necessary for bulb growth. If you live in a chilly area in USDA Zone 10 or below, go with hardnecks. They are built to survive freezing temperatures and snow cover. In fact, they thrive when the ground gets a bit of a chill.
If you want the best flavor, look for specific hardneck types. Chesnock Red is famous for its purple stripes and sweet roasted flavor. Majestic is a great choice if you want huge, easy-to-peel cloves. Red Russian is my absolute favorite because it is incredibly hardy and spicy. These will give you those massive heads you are dreaming about.
The Science of Selection: Clove Size and Harvest Potential
Success starts with the seed, or in this case, the clove. You cannot just plant any random scrap and expect greatness. There is a real science behind which cloves grow the best. We want to be very picky during the selection process. This is the first step in seeing how garlic grows from a clove into a beast.

The Correlation Between Clove Size and Bulb Weight
There is a direct link between the size of the clove and the final bulb. I ran an experiment to prove this and the results were wild. Large cloves have more stored energy to push through the soil. This extra energy helps them build a bigger root system early on. A bigger root system always leads to a bigger garlic head.
In my tests, small cloves produced heads that weighed about 29 grams. The large cloves produced heads that weighed over 71 grams on average. That is more than double the weight just by picking a bigger seed. It is a simple trick that makes a massive difference in your results. If you want honkin’ heads, you have to plant honkin’ cloves.
Sorting Your Seed Garlic
When you get your garlic heads, do not break them apart until planting day. You want to keep the cloves attached to the base as long as possible. When you are ready, gently peel the outer layers of the head. Carefully pop each clove off the central base without damaging them. You want to keep the papery skin on each individual clove.
- Inspect every clove for soft spots or signs of mold.
- Select only the plumpest and firmest cloves from the outer ring.
- Discard any cloves that feel light or look shriveled up.
- Keep the papery skin intact to protect the clove from soil pathogens.
Site Selection and Environmental Requirements
Location is everything when it comes to your garden layout. Garlic is not a plant that likes to hide in the shadows. It needs a specific environment to reach its full potential. If you pick a bad spot, the plant will struggle all season. Let’s make sure you give your garlic the best home possible.
Sunlight and Energy Production
Garlic is a total sun worshipper and needs all the light it can get. It uses sunlight to create the sugars that build the bulb underground. You should aim for a spot that gets at least six to eight hours of sun. Without enough light, the leaves will be thin and the bulbs will be tiny. Give your garlic the sunniest real estate in your backyard.
If your garden has a lot of trees, watch the shadows throughout the day. A spot that looks sunny in the summer might be shady in the fall. Since garlic grows through the winter and spring, check the low sun angles. Avoid planting near tall fences or walls that block the southern sun. Light is the fuel that powers how garlic grows from a clove.
Bed Location and Drainage
Garlic hates having “wet feet,” which means it cannot sit in soggy soil. If the ground stays too wet, the cloves will simply rot and die. You want a spot that drains quickly after a heavy rain storm. Raised beds are often the best choice for growing great garlic. They allow you to control the soil and ensure perfect drainage.
Look for an area that is flat and easy to access for watering. You will be visiting this bed for the next nine months. Make sure it is not in a low spot where water puddles up. Good airflow around the bed is also helpful for preventing disease. A well-drained, sunny spot is the foundation of a successful harvest.
Mastering the Soil: Composition and Nutrition
The soil is the engine room for your garlic plants. It provides the food and the water they need to get huge. You cannot just use plain dirt from the yard and expect pro results. We need to create a custom blend that makes the roots happy. Let’s look at what makes the perfect garlic soil.
Determining the Best Soil Blend
I spent years testing different soil mixes to find the winner. Some people use pure compost, while others mix it with native dirt. My experiments showed that a specific blend beats everything else. Pure compost is good, but it can get too packed down over time. We need something that stays light and fluffy for the roots.
The ultimate winner was a mix of 75% compost and 25% vermiculite. This blend produced the heaviest garlic heads in every single test. The compost provides the nutrients while the vermiculite keeps the soil airy. This allows the garlic bulb to expand without hitting hard, compacted ground. It is the secret sauce for growing those massive honkin’ heads.
Enhancing Microbial Life
Good soil is more than just dirt and fertilizer; it is alive. We want to fill the bed with beneficial microbes and fungi. These tiny helpers work with the roots to absorb more nutrients. Worm castings are the best way to jumpstart this biological activity. They act like a superfood for the soil and the plant.
- Add worm castings to every planting hole for a massive boost.
- Use organic fertilizers with a balanced 4-4-4 ratio.
- Avoid harsh chemicals that can kill the good microbes in the soil.
- Mix the amendments thoroughly so every clove gets a fair share.
Step-by-Step Guide to Planting Garlic
Now we get to the fun part where we actually put things in the ground. This is the moment where the journey of how garlic grows from a clove begins. We need to be precise with our measurements and timing. If you follow these steps, you will set your garlic up for victory. Let’s walk through the process together.

Timing the Fall Planting
Timing is the most important factor in the entire planting process. You want to get the cloves in the ground before it freezes solid. However, you do not want to plant so early that they grow huge leaves. The goal is to get strong root growth before the winter nap. This usually happens in the mid to late fall.
If you live in a cold area, aim for early to mid-October. This gives the plant a few weeks to settle in before the snow. If you are in a warmer zone, you can wait until November. Check your local frost dates to find the perfect window for your area. Generally, a few weeks before the first hard frost is the sweet spot.
Preparing the Spacing and Depth
Spacing is key because garlic bulbs need room to puff out. If they are too close, they will compete for food and stay small. I like to use a 6-inch or 7-inch off-center spacing pattern. This gives each plant plenty of “elbow room” to get massive. You can use a ruler or a specialized garden tool to stay accurate.
Depth is also a big deal for protecting the clove from the cold. You want to plant each clove about 4 inches deep into the soil. This depth acts as a warm blanket during the freezing winter months. It also ensures the roots have plenty of room to grow downward. Use a Hori Hori knife or a simple stick to measure your depth.
Amending the Planting Hole
We don’t just drop the clove into a dry hole and hope for the best. We want to give it a little “lunch box” of nutrients to start with. Into each hole, drop a handful of high-quality worm castings. Then, add about one tablespoon of organic 4-4-4 fertilizer. This provides an immediate source of food for the emerging roots.
Placing the Garlic Clove
The way you drop the clove into the hole actually matters. You should see a flat, scabbed-over end and a sharp, pointy end. The flat end is where the roots will eventually pop out. The pointy end is where the green leaves will grow toward the sun. Orientation is a vital part of how garlic grows from a clove properly.
- Place the flat end down into the bottom of the 4-inch hole.
- Ensure the pointy tip is facing straight up toward the sky.
- Avoid laying the clove on its side as this stunts early growth.
- Press it firmly into the soil amendments so it has good contact.
Backfilling and Finishing
Once all your cloves are in their holes, it is time to cover them up. Gently pull the surrounding soil back into the holes. You want to make sure there are no big air pockets left behind. Lightly pat the surface of the soil with your hand to settle everything. Do not stomp on it, as you want the soil to stay airy.
If the soil is very dry, you can give it a light watering. You don’t want it soaking wet, just a little bit moist. This helps the cloves realize it is time to start growing roots. Most of the time, the natural fall rain will handle this for you. Your garlic is now tucked in and ready for the next phase.
Applying the Insulating Mulch Layer
Mulch is the final secret to a successful winter for your garlic. You want to cover the entire bed with 2-3 inches of organic material. Leaf mulch or clean straw are the best options for this. This layer acts like a thick winter coat for the soil. it keeps the temperature steady even when the air is freezing.
Mulch also helps keep weeds from moving in during the early spring. It holds moisture in the soil so the roots do not dry out. As it breaks down, it adds even more organic matter to your bed. This is a crucial step in the process of how garlic grows from a clove. Never skip the mulch if you live in a place with cold winters.
Winter Protection and Dormancy
During the winter, your garlic bed might look like it is doing nothing. Under the mulch, however, a lot of action is happening. The cloves are drinking up water and pushing out thick white roots. They are anchoring themselves into the soil for the spring explosion. This dormancy period is essential for a big harvest later.
The Role of Mulching
The mulch is doing heavy lifting throughout the darkest months of the year. It prevents the soil from “heaving,” which happens when the ground freezes and thaws. Heaving can actually push your cloves right out of the dirt. The mulch layer stops this by keeping the soil temperature very stable. It is a protective barrier against the harshest winter weather.
If you get a lot of wind, you might need to add a bit more mulch. Make sure the layer stays at least two inches thick all winter long. You can use old leaves from your yard if you shred them first. Just avoid using whole leaves that can mat down and block water. A good mulch layer makes for happy, healthy garlic bulbs.
What Happens Underground in Winter
The root system of a garlic plant is surprisingly large and deep. Even when it is freezing outside, the soil down deep stays a bit warmer. The clove uses its stored energy to build a network of roots. These roots are what will pull in all the nutrients in the spring. A strong winter root system is the key to a huge head of garlic.
If you were to dig up a clove in January, you would see long roots. You might even see a tiny green nub starting to form at the top. The plant is just waiting for the signal that spring has arrived. This patience is a big part of how garlic grows from a clove. Let nature take its course and do not disturb the bed.
Spring Management and Growth Preparation
When the snow melts and the birds start singing, it is go-time. This is the most exciting part of the growing season. You will finally see the fruits of your labor popping out of the dirt. We need to help the plants transition into their heavy growth phase. Let’s get the bed ready for the spring rush.

Breaking Dormancy
You will notice green spikes poking through the mulch as soon as it gets warm. This is the plant’s way of saying it is ready to grow. Once those shoots are about 4 or 5 inches tall, you can take action. Carefully pull back the mulch from the base of the plants. You want the sun to hit the soil and warm up the roots.
You can put the old mulch into your compost pile to continue breaking down. Removing it allows you to get close to the soil for feeding. It also lets you see any weeds that might be trying to steal nutrients. This is the moment when the garlic starts its rapid climb toward the sky. The cycle of how garlic grows from a clove is now in high gear.
Spring Feeding Schedule
Garlic is a “heavy feeder,” which means it needs a lot of nitrogen in the spring. This nitrogen helps the plant grow those big green leaves. The more leaves a plant has, the bigger the bulb will eventually be. We want to give them a high-protein breakfast to start the day. This is the most important feeding of the entire year.
- Apply organic fertilizer at a rate of one tablespoon per square foot.
- Scratch the fertilizer into the top inch of the soil very gently.
- Top-dress with compost by adding a fresh one-inch layer to the bed.
- Water it in immediately to help the nutrients reach the root zone.
Irrigation and Moisture Management
Water is the lifeblood of a growing garlic bulb. Without enough moisture, the plant will stop growing and the bulb will be dry. However, too much water can still cause rot even in the spring. You need to find a balance that keeps the soil consistently moist. Let’s look at how to master the art of watering.
The Science of Watering Garlic
As the days get longer and hotter, the plants will drink more water. The big leaves act like straws, pulling moisture out of the ground. You should check the moisture level of your soil every few days. Do not just look at the surface, as it can be deceiving. The real story is happening a few inches down where the roots live.
Use the “finger test” to check if your plants are thirsty. Stick your finger about two inches into the soil near the plants. If it feels cool and damp, you are probably good for another day. If it feels dry and crumbly, it is time to break out the hose. Consistent moisture is the secret to how garlic grows from a clove into a juicy head.
Duration and Frequency
When you water, you want to do it deeply and thoroughly. Shallow watering only wets the surface and encourages weak roots. I like to water until the water starts to pool on the surface for a second. Then, I move to the next spot and let the water soak in deep. This ensures the entire root zone gets a good drink.
You might need to water every other day during a hot spring. If it rains a lot, you can obviously take a break. The goal is to never let the soil get bone-dry. If the leaves start to wilt, you have waited way too long. Keep a close eye on the weather and your soil moisture levels.
Setting Up Automatic Irrigation
If you are busy, an automatic irrigation system is a life saver. It takes the guesswork out of watering and ensures consistency. Garlic loves a predictable schedule of moisture. I use a simple drip system that runs for about 25 minutes every other day. This keeps the soil perfectly damp without overwatering.
- Install drip tape or soaker hoses directly in the garden bed.
- Use a battery timer to automate the watering schedule for you.
- Adjust the timer as the weather gets hotter in the early summer.
- Check for leaks regularly to make sure every plant is getting water.
Mid-Season Care: Scapes and Maintenance
By May and June, your garlic plants will be huge and impressive. If you are growing hardnecks, you will see a new development. A curly, green stalk will grow out of the center of the plant. This is the garlic scape, and it is a delicious bonus harvest. Managing these scapes is part of the process of how garlic grows from a clove.

Managing Hardneck Scapes
The scape is actually the flower bud of the garlic plant. If you leave it on, the plant will spend energy trying to make seeds. We want that energy to go down into the bulb instead. Once the scape makes one or two full curls, it is time to cut it off. Simply snip it at the base where it meets the leaves.
Don’t throw these scapes away because they are amazing to eat! They taste like a mix of garlic and green beans. You can grill them, make pesto, or chop them into stir-fries. Removing them helps the bulb grow up to 25% larger. It is a win-win for both your kitchen and your garden harvest.
Weed Control
Weeds are the enemy of a big garlic harvest. They steal the water and fertilizer that your garlic needs. Because garlic has a long growing season, weeds have plenty of time to move in. You need to stay on top of weeding throughout the entire spring. A clean bed means bigger, healthier garlic heads in the end.
Be careful when pulling weeds near the garlic plants. You do not want to disturb the delicate roots of the garlic bulb. Use a small hand tool to snip weeds at the soil line instead of pulling them. You can also re-apply a light layer of mulch to keep weeds down. A little maintenance every week goes a long way.
Troubleshooting Common Garlic Issues
Even the best gardeners run into problems sometimes. Garlic is generally tough, but it can get sick or stressed. Knowing what to look for can save your harvest from disaster. You need to be a bit of a detective in your garden bed. Let’s look at the most common issues you might face.
Pest and Disease Management
Fungal rot is the biggest threat to your garlic plants. It usually happens if the soil is too wet for too long. You will see yellowing leaves and a soft, mushy base at the soil line. If you see this, stop watering immediately and let the soil dry out. Avoid planting garlic in the same spot two years in a row to prevent this.
Onion maggots are another pest that can ruin your day. These tiny white worms eat the roots and the bulb underground. You might see the plant suddenly wilt and die for no reason. Using a row cover early in the spring can stop the flies from laying eggs. Always start with clean, high-quality seed garlic to avoid bringing pests home.
Growth Stunting
If your garlic is tiny and not growing, it might be hungry. Yellow leaves are a classic sign of a nitrogen deficiency. Make sure you are following a regular feeding schedule with organic fertilizer. If the plants stay small, check your sun exposure again. Without enough light, the process of how garlic grows from a clove will fail.
Soil compaction can also stop a bulb from getting big. If the ground is as hard as a brick, the bulb has nowhere to expand. This is why adding vermiculite and compost is so important early on. If you see cracks in the soil, it is too dry and too hard. Keep the bed moist and airy for the best results.
Harvesting the “Honkin'” Garlic Heads
The big day is finally here! Harvesting garlic is like digging for buried treasure. You have waited nine months for this moment, so do not rush it. Timing the harvest perfectly is the difference between great garlic and a total mess. Let’s look at the signs that your treasure is ready.

Signs of Readiness
You can’t see the bulb, so you have to read the leaves. As the garlic matures, the bottom leaves will start to turn brown. This happens because the plant is moving energy from the leaves into the bulb. When the bottom three or four leaves are brown but the top ones are still green, it is time. If you wait until all the leaves are brown, the bulb skins will split open.
Split skins are bad because the garlic will not store well. You want a solid, tight wrap around the cloves for the best shelf life. You can dig up one “test bulb” to see how it looks before harvesting the whole bed. The cloves should be plump and well-defined under the skin. This is the peak moment of how garlic grows from a clove.
Extraction Techniques
Never pull the garlic out of the ground by the stem! The stem can snap off, leaving the bulb stuck in the dirt. Use a garden fork or a shovel to gently loosen the soil around the plants. Dig several inches away from the bulb to avoid cutting it. Once the soil is loose, you can lift the entire plant out by hand.
- Loosen the soil deeply before trying to lift the garlic.
- Gently shake off the excess dirt from the roots and bulb.
- Handle the bulbs carefully as they can bruise just like an apple.
- Avoid washing them with water as this can lead to mold issues.
Post-Harvest: Curing and Storage
Your work is not quite done once the garlic is out of the ground. Freshly dug garlic is full of moisture and will rot quickly. It needs to “cure,” which is a fancy word for drying out. This process thickens the skins and prepares the garlic for storage. Let’s make sure your harvest lasts for months.

The Curing Process
Find a cool, dry place with plenty of airflow for your garlic. An out-of-the-way porch or a shady garage works perfectly. Do not put the garlic in direct sunlight, as it can actually cook the bulbs. Hang them in bundles or lay them out on a screen in a single layer. They need to sit like this for about two to three weeks.
You will know they are cured when the outer skins are dry and papery. The roots should feel brittle and the neck of the garlic should be hard. This drying period is the final step in how garlic grows from a clove. It locks in the flavor and makes the cloves stay fresh. Patience during curing is just as important as patience during growing.
Cleaning and Trimming
Once the garlic is cured, you can clean it up for the kitchen. Use a pair of garden snips to cut the roots down to about half an inch. You can also trim the stems if you are not planning to braid them. Gently brush off any remaining dried dirt with your fingers or a soft brush. Do not peel off the beautiful, papery outer layers.
- Trim the roots carefully to avoid cutting the base of the bulb.
- Cut the stems to about one or two inches for easy storage.
- Leave the skins on to protect the cloves from drying out.
- Sort the bulbs by size so you can use the smallest ones first.
Long-term Storage Solutions
Store your cured garlic in a place with moderate humidity and cool temperatures. A dark pantry or a dry basement is usually a great choice. Avoid putting garlic in the refrigerator, as the cold can trigger it to sprout. Mesh bags or woven baskets are perfect for allowing airflow. If stored correctly, softnecks can last up to nine months.
| Garlic Type | Storage Life | Best Storage Condition |
| Softneck | 9-12 Months | Cool, Dry, Dark |
| Hardneck | 4-6 Months | Cool, Dry, Dark |
| Elephant Garlic | 8-10 Months | Cool, Dry, Dark |
Check your stored garlic once a month for any soft or sprouting bulbs. Remove any bad ones immediately so they do not affect the rest. With a little care, you can be eating your homegrown garlic all winter long. It is the ultimate reward for your hard work in the garden.
Conclusion and Planning for Next Season
Growing garlic is a cycle that never really ends. Once you harvest, it is almost time to start thinking about the next fall planting. Take a look at your results and see what worked best for you. Maybe you liked the flavor of the Red Russian more than the others. Or maybe your soil blend needs a little more compost next year.
Save your biggest and best heads to use as “seed” for the next round. This way, you are creating a strain of garlic that is adapted to your specific garden. This is how garlic grows from a clove into a legacy for your family. Each year, your honkin’ heads will get even bigger and better. Happy gardening, and enjoy every single bite of that amazing garlic!
FAQs
What should I do if my garlic cloves start sprouting before I plant them?
If you see green nubs before you get them in the dirt, do not panic. This just means the clove is super eager to grow. You can still plant them as long as the clove itself is firm. Just be extra careful not to snap that little green sprout when you tuck it into the hole.
Can I grow garlic in containers or pots?
You can totally grow garlic in pots if you do not have a yard. Just make sure the container is at least 10 to 12 inches deep. This gives the roots enough room to do their thing. Use a high-quality potting mix and keep it in a sunny spot on your balcony.
Is it okay to use garlic from the grocery store as seed?
It is usually a bad idea to plant store-bought garlic. Most of that garlic is treated with chemicals to stop it from sprouting. It might also carry diseases that can ruin your garden soil for years. Always buy certified organic seed garlic from a reputable grower.
Why did my garlic cloves turn into one solid bulb instead of segments?
If your garlic looks like an onion with no separate cloves, it is called a “round.” This usually happens if the plant did not get enough cold weather in the winter. It is still totally edible and tastes exactly like regular garlic. You can even plant that round next fall to get a massive head.
Can I plant garlic in the spring instead of the fall?
You can plant it in early spring, but the heads will be much smaller. Garlic needs that long winter chill to split into separate cloves. Spring-planted garlic often results in those solid “rounds” mentioned earlier. Fall is always the best time for a real-deal harvest.
What are the best companion plants for garlic?
Garlic is a great neighbor for most plants because its smell keeps pests away. It grows really well near roses, tomatoes, and fruit trees. Avoid planting it near beans or peas, though. Garlic can actually stunt the growth of those specific legumes.
Does garlic need fertilizer during the winter months?
Your garlic is basically sleeping during the winter, so it does not need a snack. Adding fertilizer to frozen ground is just a waste of money. Wait until you see those green shoots in the spring to start your feeding schedule. Let the mulch do all the work during the cold months.
How do I know if my garlic has a fungal disease?
Keep an eye out for fuzzy white or gray mold near the base of the plant. If the leaves turn yellow and the plant feels loose in the dirt, you might have rot. This usually happens from overwatering or poor drainage. Remove any sick plants immediately to save the rest of the bed.
Can I eat the garlic immediately after I dig it up?
You can absolutely eat “fresh” or “green” garlic right out of the dirt. It has a much milder flavor and the skins are very juicy. You only need to cure it if you want to store it for several months. Many chefs actually prefer the taste of fresh-harvested garlic.
What happens if I plant the cloves too shallow?
If you only go an inch or two deep, the frost might push the cloves out. This is called frost heaving and it can kill the young roots. Shallow cloves are also more likely to get dug up by squirrels or birds. Stick to that four-inch depth to keep them safe.
Should I peel the papery skin off the clove before planting?
Leave that skin on because it acts like a little suit of armor. It protects the tender clove from bacteria and fungus in the soil. If it falls off on its own, it is fine to plant it. Just do not go out of your way to strip it naked.
How do I stop squirrels from digging up my garlic bed?
Squirrels love fresh-dug dirt and might think you hid nuts there. Covering the bed with a layer of chicken wire or hardware cloth can stop them. You can remove the wire once the ground freezes or the shoots pop up. The mulch layer also helps hide the cloves from curious eyes.
Why are the tips of my garlic leaves turning brown in May?
A little bit of brown at the very tips is usually normal. It can happen from a late spring frost or a quick dry spell. As long as the rest of the leaf is green and strong, your plant is fine. Only worry if the browning moves fast down the whole leaf.
Can I grow elephant garlic using these same steps?
Elephant garlic is actually a type of leek, but it grows very similarly. It needs more space because the bulbs get absolutely humongous. Give each clove at least 10 to 12 inches of room. Other than that, the soil and watering rules stay the same.
Is it normal for garlic to produce tiny bulbs on the stem?
These are called bulbils, and they grow on the top of the hardneck scapes. You can plant these tiny “seeds,” but it takes two or three years to get a full head. Most people just cut the scapes off to keep the energy in the main bulb. It is a fun experiment if you have the patience.
What is the best way to handle a very wet spring?
If your yard is turning into a swamp, you need to improve the drainage fast. You can dig small trenches between the rows to help water move away. Adding more mulch can also help absorb some of the excess moisture. This is why raised beds are such a lifesaver for garlic.
How can I tell if my garlic is getting too much sun?
It is almost impossible to give garlic too much sun in most climates. However, in extreme desert heat, the leaves might look bleached or crispy. If you live in a place with 100-degree spring days, a light shade cloth might help. For most of us, the more sun, the better.
Can I use grass clippings as mulch for my garlic?
Grass clippings work great as long as they are “clean.” Make sure the lawn was not treated with weed killers or chemicals recently. Also, let the clippings dry out for a day before putting them on the bed. Wet, fresh grass can mat down and get slimy.
Why did my garlic cloves start growing new shoots while still in the ground?
This is called “regrowth” and it happens if you harvest too late. The bulb thinks it is time to start the next year’s cycle already. These bulbs will not store well at all because the protective skins have broken. Use these up in the kitchen right away.
Does the moon phase really matter for planting garlic?
Some old-school gardeners swear by planting garlic during a waning moon. There is not a lot of hard science to prove it, but it does no harm. If you like following traditional garden lore, go for it! The most important thing is still the soil quality and the timing.